

Black Sea Bass is a great fish. It is both easy to catch and easy to cook. Here I share a sea bass recipe with parsley sauce that can be applied to fresh or frozen sea bass, or a similar fish you could buy today.
Black Sea Bass is a great fish. It is both easy to catch and easy to cook. Here I share a sea bass recipe with parsley sauce that can be applied to fresh or frozen sea bass, or a similar fish you could buy today.
Kitchen Tools
What you need instead of all those fancy gadgets.
I work in a lot of different kitchens. I have been fortunate enough to cook in some very nice commercial kitchens, as well as home kitchens that dreams are made of. Although I would love to bask in my own glorious kitchen, currently, I have very limited space–so everything I have in it has a purpose.
I bring a kit of tools, spices, vinegars, and a whipping siphon in addition to my knives everywhere I go. Seriously. There is no room for extra gadgets in a small home, or a tight kit. But with a handful of simple tools, most jobs can be accomplished in the kitchen.
Over the next few weeks I am going to tackle the topic of kitchen basics and staples, so check in next week for a look at kitchen knives. This week I am going to highlight some of the kitchen tools I find most useful, and may often get overlooked.
The
Basics
Embrace these
ever-useful tools.
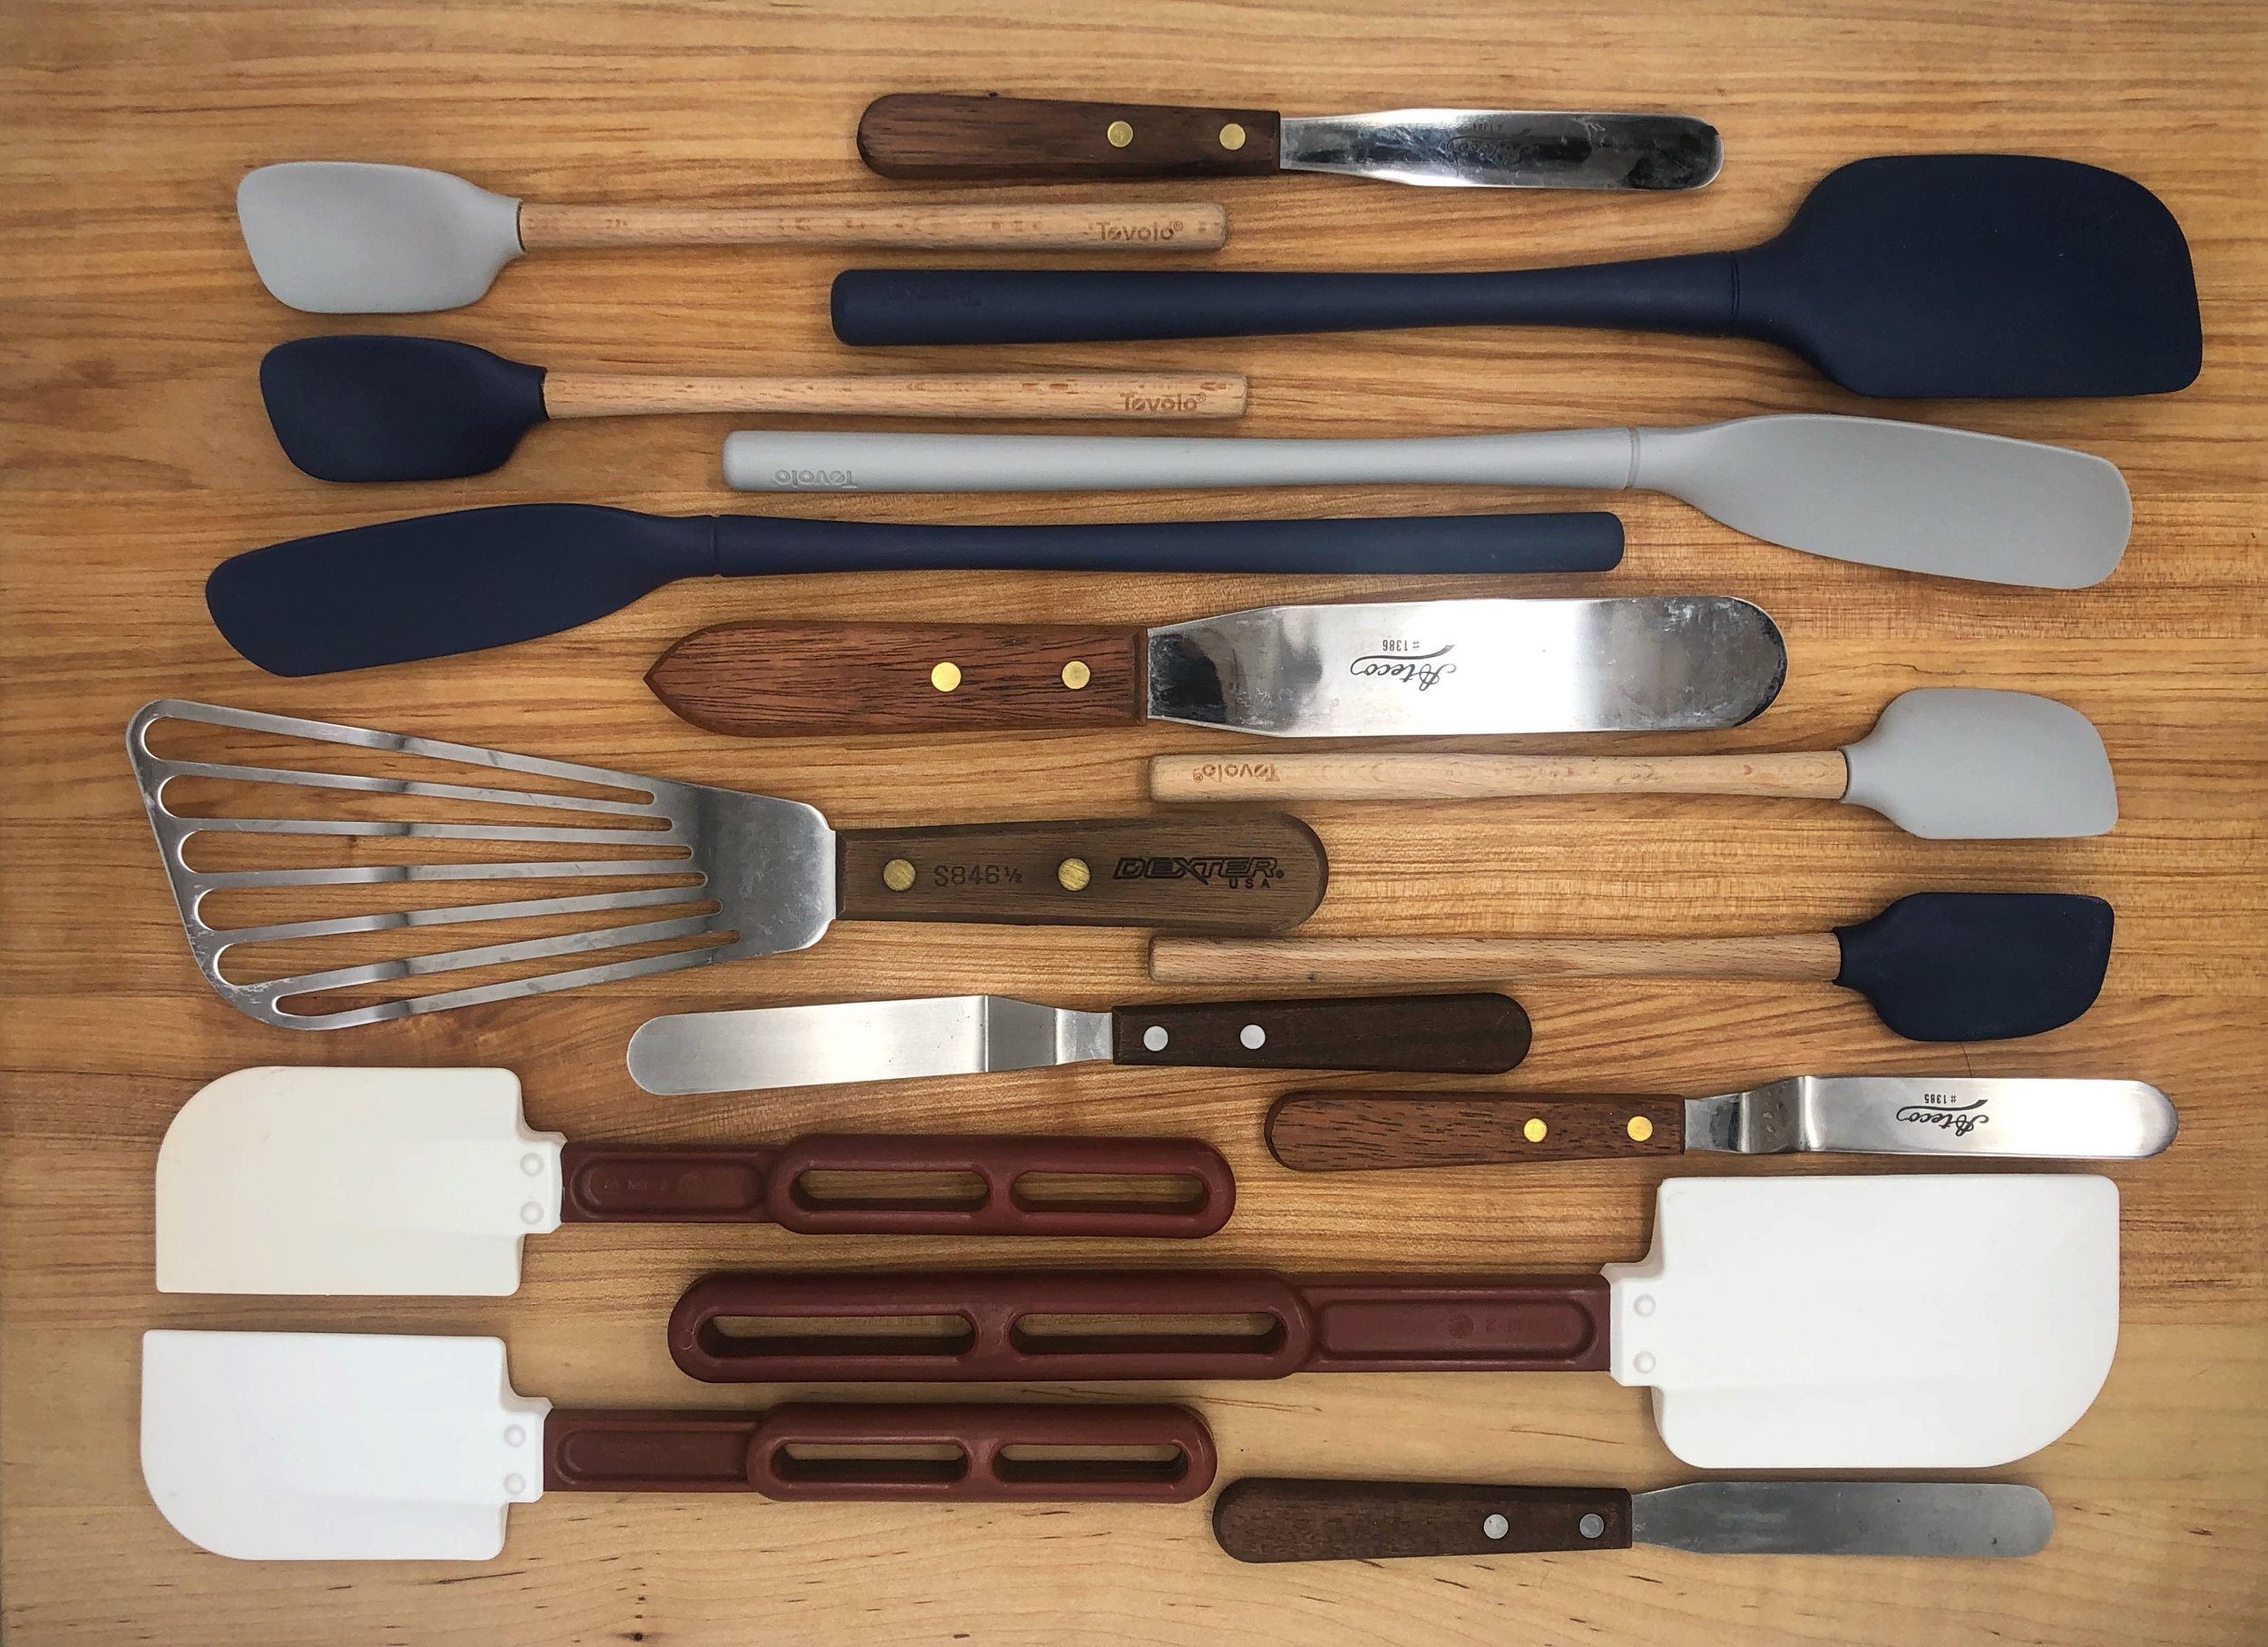
There are a number of types of spatulas, and I am a fan of most of them. Small rubber spatulas are excellent for cleaning the bottom of bowls, jars, or even cleaning something sticky from a larger rubber spatula. You would be surprised at how much a good clean scrape can get out of the bottom of your blender after you make a tasty sauce.
Remember a tradesman is only as good as their tools. Be sure to buy quality kitchen tools, as these are going to be used over and over again to make the food you consume on a daily basis. With rubber spatulas it is important to get something that can withstand high heat, and always remember to remove them from your pan when you are done stirring, as they often have plastic handles.
Flat metal spatulas or offset spatulas of all sizes are useful. If you’re not familiar with the term offset spatula think of the long, narrow tools that have a thin, flat metal blade or paddle at one end.
Larger ones can be used to move things in the pan while sautéing food, spreading frosting over a cake, cutting and serving dishes, and much more.
Smaller ones are useful for plating dishes, scraping seeds from fruits and vegetables, portioning or spreading butter–the list goes on. Even in a small kitchen there is room for a number of good spatulas, and they always make great gifts for the home chef in your life.
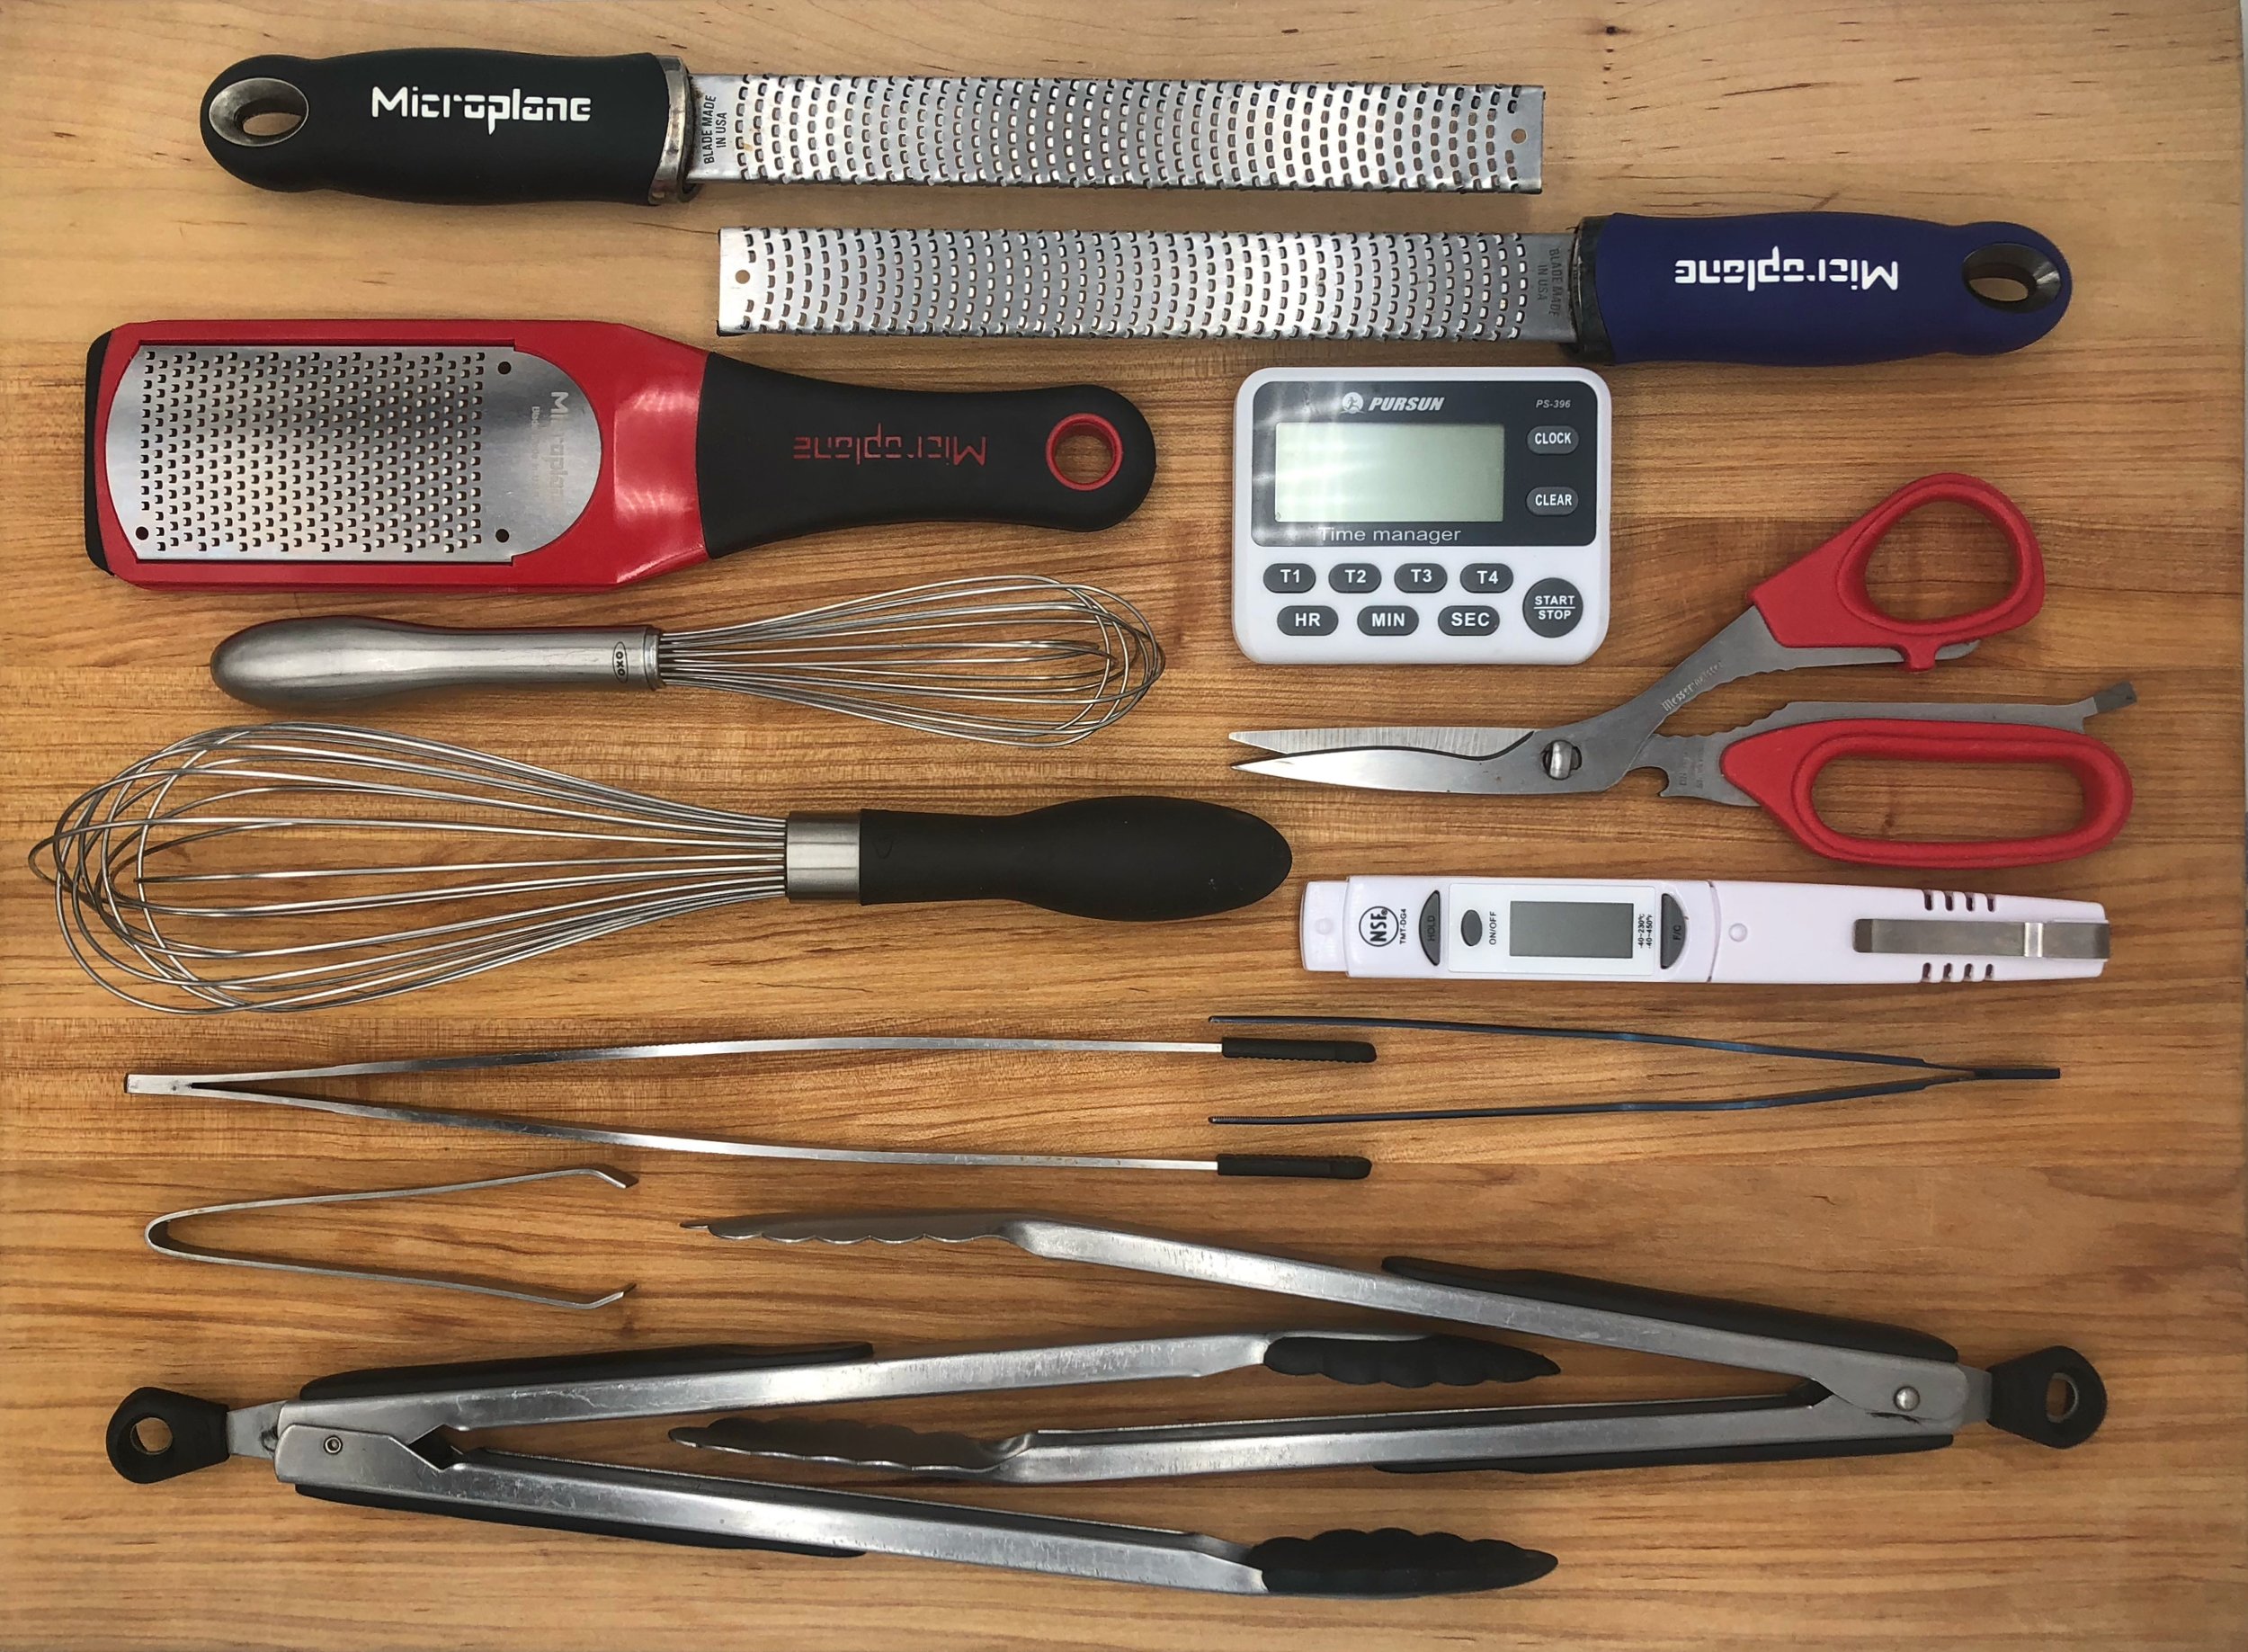
These handy graters are very useful in the kitchen, for hard cheeses, grating cured egg yolk, frozen cucumber, and of course zesting citrus.
Let’s face it, you most likely have at least one pair of mediocre or even just downright lousy tongs at home, tucked away in a drawer waiting for the opportunity to make your life miserable. Instead replace them with tongs that have a firm spring inside; you want them to meet firmly in the center of each side of the pair, and you want them to be solid. I like to carry both a pair of steel tongs with rubber tips and a pair without wherever I go. The rubber tipped tongs are great for pans of all kinds, the better you care for your cookware, the longer it will last. The pair without the rubber covered tips are great for higher heat like grilling, or to use while cutting.
Smaller tongs and tweezers have their place in my kit as well. Long oversized tweezers are great to roll and pick up long pastas from the pan. Tweezers are great for plating, and handling delicate things, even cooking small things like bay scallops.
The strainer is a very useful tool. It can sift, it can strain, and it is perfect to pass sauces and creamy soups through before serving. I like a finely woven metal strainer that is as sturdy as I can find. I have them in several sizes, but one good strainer will help you out of a surprising number of jams in the kitchen. Personally I like to have a long handle on my stainers as it makes them much easier to move around, or hang onto if you are passing something through it with a ladle or spoon.
You will probably still probably need a set of measuring spoons and cups around to make grandma’s famous jello casserole, at least until you convert the recipe to grams. Weighing ingredients instead of using measuring vessels is a much more accurate way to reproduce results. It is also much easier to multiply recipes with consistency. Believe it or not, all measuring cups are not created equal, and there is a lot of room for error. Learning to use grams while baking can also open your world to a whole new set of recipes from the large parts of the world that use the metric system. Want to hear more? I wrote all about the value of using grams in a past article for Edible Vineyard.
Although I am comfortable eyeballing a lot of meat temperature, it is important to make sure you are cooking food not only deliciously, but also safely. Digital instant read thermometers are a great tool to help you stay safe, and achieve consistent results. You can find a handy reference of food safe temperatures here.
A good quality set of kitchen scissors does a lot more than open plastic packages. Scissors are great for getting at lobster meat, cutting parchment when the metal teeth fall out of the box, and even scoring bread before baking. They should be able to come apart so you can clean and sanitize them properly. You want the two sides of the scissors to meet firmly, and to feel sturdy. Good kitchen shears are built for use and abuse, and make a lot of jobs easier.
Keeping good track of time is the key to staying organized, and having things all come together at the right time while you are cooking. I carry a small timer/clock that has four timers built in. Sure, you can accomplish this with your phone, but I try not to have my hands all over my phone while I'm cooking, for sanitizer purposes and so I stay present in the task at hand.
Spoons of all sizes are very useful, and you will find a set of spoons in most professional cook’s kits. Tasting as you cook is important, and a few spoons (that are cleaned regularly) are a great way to stay in touch with the food as you build flavor. Spoons of all sizes are useful to scrape seeds from vegetables, plate and sauce dishes, stir, measure. The spoon is a mighty tool and worth a little praise.
Not many homes I visit have enough mixing bowls. These inexpensive and very useful bowls can make life a breeze in the kitchen. They are easy to clean, and can be used to measure, mix, portion, even use it as a double boiler, or an ice bath . Look for at least a few mixing bowls with a rolled edge, rather than straight sides, the rolled edge will help prevent dripping when you pour things out of them. To limit waste and make cleanup a lot easier, be sure to use one of your handy spatulas to get everything out of the bowls.

Quality Tools
Because you’re only as good as the tools you use.
White chocolate whipped parsnips make a decadent side dish that is simple and affordable to make.
In this exciting video, My wife Angela and I work our way through stretching a dough ball, and topping it with things, then putting it in the oven properly. She is trying to cook these recipes herself, but wasn’t able to stay up late enough with me to make the dough the night before.

For years people have been asking me for cooking advice, and more specifically to make cooking videos. I have resisted for all of those years but it's a pandemic and I couldn’t listen to my wife, Angela (a social media manager and digital content creator) complain any longer.
In our house I cook virtual everything. We have not eaten a meal from a restaurant, or other take out establishment, in months, and we have been very fortunate to have eaten really well through all of this. After the thousandth time she asked, I finally gave in, and we are now creating videos in which I teach her how to cook.
Angela and I have been together for 16 years, so she’s never really needed to learn how to cook as an adult. That being said she has extremely limited knowledge (aside from what she sees me do) so we will be sharing recipes that will be easy for anyone to replicate, regardless of their culinary expertise. On our first video we make a deeply flavorful tikka spiced chicken. You can watch me take her through it here, detailed recipe below.
Here I instruct my wife Angela on creating a Tikka Spiced Chicken. For years people have been asking me for cooking advice, and more specifically to make coo...
If you don't have all of the ingredients for the marinade you can simply substitute those that you have and like, the key is the yogurt, some heat, and some good indian spices, it's a base you can make your own.
Tikka Spiced chicken
Ingredients:
2Lbs Chicken (we used breasts, you can just about anything, remember smaller pieces cook more quickly, this also makes incredible wings!)
-Marinade
Ingredients:
1 Tbsp fresh ginger (or 1/2 tsp powdered ginger)
4 Tbsp Tikka spice- (coriander, cumin, paprika, garam masala)
2 tsp Chili flakes (chipotle, or other chili spices work well)
1 & ½-2 Cups Plain yogurt
1 tsp Kosher Salt
Method:
-mix all marinade ingredients, coat chicken well and refrigerate for a minimum of three hours (overnight works really well)
-Cook in heavy cast iron skillet, or dutch oven at 375-400 degrees for 20-30 minutes, turn a few times to achieve a nice even cook (internal temp at least 165 degrees)
- Let rest for 5 minutes before cutting or serving
Cauliflower
Ingredients:
1 Head cauliflower (cut into crowns)
2 & ½ Tbsp Curry spice (Indian curry)
2-3 Tbsp Olive oil
1tsp Kosher salt
Method:
-Coat cauliflower in oil
-Cover with spices and mix well
-Cook in baking sheet at 375 degrees for about 15 minutes (until just starting to blacken, firm tender)
Last minute yogurt sauce
Ingredients:
¾ Cup Yogurt
¼ cup minced cucumber
2 Tbsp minced fresh parsley
2 Tbsp minced fresh cilantro
2 tsp Honey
½ tsp salt
1 Tbsp lemon juice
-Mix
This was a quick addition that I put together, as Angela’s knife skills are still something we need to address, it is quite tangy on its own, but complemented the chicken very nicely!!

The following is an article I wrote for Edible Vineyard magazine. If you haven’t already gotten on the gram train… I suggest you do.
Several months ago, I submitted a recipe for a simple pasta dough to an editor at The MV Times (and one of the editors of this formidable magazine). Without thinking, I submitted the recipe using grams as the unit of measure. As a chef, this is standard practice, and I am regularly interpreting and creating recipes this way. And bakers will tell you there is no other way. Little did I know this reliance on grams would spark an ongoing conversation about why exactly they are used in recipes.
There are several answers to this question. The first being, you can’t confuse grams. The gram is a unit of measure for weight, and weight only. Ounces can be a unit of volume or a unit of weight, and there is the problem: Dense liquids such as heavy cream don’t have the same volume as water. If you’re eyeballing these two liquids by volume, you’ll end up with a lot more cream than you need. The volume-to-weight difference might be minor on a small scale of one ounce by volume. However, when you multiply that exponentially in a recipe that calls for measurements by weight, it can completely change a recipe.
Secondly, grams are very small, which means you rarely need to deal with fractions. Though I occasionally measure things like yeast to the tenth of a gram, a gram is small enough that you rarely have to break it down further. With grams, I never have to do anything like dividing ⅓ of a cup by seven. When cooking fresh vegetables or fish for a family meal, I am not weighing anything. I cook by feel, instinct, and muscle memory. Flavor, and texture can be adjusted by adding ingredients as you cook. But when baking, making dough for pasta, or even a complex mousse or sauce, I’m sticking to grams. I measure everything as accurately as possible, because you cannot change the flavor or texture of most things once they are baked. When I cook for large groups I often multiply a recipe several times. Using grams when I multiply by two or even ten times, my recipe will be just as good as a single recipe and consistent across the board.
Measuring everything by weight is also extremely helpful when understanding proportions. Not everyone knows off the top of their head that there are three teaspoons in a tablespoon, or 16 tablespoons in a cup. The difference between 5 grams and 500 grams is a lot easier to understand, break down, and multiply.
Then there’s the fact that not all measuring cups are actually the same size. Different brands of measuring cups are slightly different in size and shape. When the average cook eyeballs a measurement, it can easily be off by a significant percentage. In order to illustrate this point, I asked two friends to measure out a cup of flour using the exact same measuring cup. I weighed them using a digital scale set to measure grams. Though both appeared to be full and level, the two measurements were different by nearly 30 grams. If you were making a large batch of biscuits and had to multiply a recipe by ten times, you could have ended up with an extra 300 grams of flour in our recipe. Additionally, grams are an internationally used and understood unit of measure. It’s mostly just in the U.S. that cooks are still weighing things in pounds and ounces. When you’re able to use grams, it allows you to open up your tastebuds to recipes from around the world, and share your own recipes with cooks outside the U.S. (and vice versa).
Don’t be intimidated by a recipe that uses grams. If you don’t already own one, get yourself a digital kitchen scale. They can be found in any cooking store, and even some grocery stores. Simply flip it on, and hit the unit button until it reads grams. Each time you weigh something, place the empty container or measuring cup on top of the scale and hit “tare.” This will zero out the weight of your container, allowing for easy measuring. Simply put your ingredients in the preweighed container, and voilà, grams are your new best kitchen friend.
Gavin Smith is a fishing columnist for The MV Times, a frequent contributor to The Times and this magazine, and a private chef.

It started with this photo, a bagel, and a tasty one at that. I posted the photo, and before I knew It, I was getting message upon messag asking questions about basic dough. Now a number of these questions were in regards to bagels specifically, but the same general principles apply to most doughs. Many people are home trying new baking projects during this time, and I felt it was appropriate to share some basic dough knowledge.
You do not need a mixer for basic doughs. When you mix dough, form a well in the center of your flour (and other dry ingredients) in a large bowl. Add your wet ingredients, and bring the flour into the well from the outside in. Pinch with your thumb and forefinger like a lobster to bring dough together for no knead recipes, autolyse, poolish, and biga. For doughs that you are kneading, you can use your whole hand to smash the ingredients together.
Most dough can easily be fixed by adding either flour or water. Err on the side of caution when adding these ingredients as a fix. If it is too wet, add flour, if it is to firm add water. Most doughs should be moist but not sticky. Use warm water, as cold water will make your dough extra sticky. When you first take the freshly formed dough out of your mixing bowl and transfer it to your working surface it may be sticky. lightly flour your working surface, and slowly add small amounts of flour at a time while kneading. Remember that some of the flour in the dough is not fully hydrated, so add flour sparingly. When the dough is no longer sticky you can stop adding flour and work the dough with your hands.
Knead for a long time, if you are new to baking it is probably longer than you think. The process of kneading builds gluten structure in the flour. This structure will hold the gas bubbles created by the yeast and sugars in the baking process. if your dough doesn’t have good structure, it will rise in the oven when the gases release, then fall flat, and yield dense results. If a recipe says “knead for 10 minutes,” they mean 10 full minutes of continuous movement. Don’t be afraid to use your body weight to move the dough. Push the dough down and away from you, turn it a quarter turn onto its point, and repeat. Pushing away from you with solid downward pressure. As the gluten structure forms, you can lighten up on the pressure, but don’t stop kneading until you have reached the desired result. In most cases you are looking for a smooth and very consistent dough. In the kitchen chefs and bakers often shit their leg positions to tolerate standing in one spot for a long time without body pain. I recommend the sumo stance.
Pay attention to proofing. Proofing is the period of time when you let the dough rest. The yeast ferments the flour in the dough producing gas, and increasing the size of the dough. When you proof dough the finger dent test is a useful tool. Pick a finger, any finger. Now lightly flour said finger and press it about 1/4 inch into the proofing dough. If the dimple bounces back quickly and completely, the dough is not yet proofed. If it bounces back just a little, and gently, it is proofed. If the dimple does not bounce back at all your dough is over proofed. If you proof a dough more than once, the finger dent test is still applicable on both proofs.
Now this principle dose not apply to starters like autolyse, poolish, and biga. Your starters should be sticky, you don’t need to work starters much at all, just bring them together then apply the proofing rules after mixing the final dough.
Be Kind to dough, it’s a living breathing thing. When you are proofing the dough, cover it, as it can form a hard film on the outside that will result hard clumps in your final product. Keep it in a nice warm place while its proofing, dough rises best in a warm place.
If you don’t like the result of your baking, think about how wet or dry your dough was. Examine your proofing process, and make sure you knead until the dough is smooth. Sometimes it takes experimentation to get your desired result. Listen to though dough, and remember that elevation, humidity, barometric pressure, and other factors will affect your dough. Sometimes you will need more water, or flour than a recipe calls for, don’t be afraid to tweak your recipe the next time you bake. Follow the 10% rule when changing your formula, change one ingredient at a time, no more than 10% at a time. This will allow you to keep track of the difference each ingredient makes. If you change the ratio of four or five ingredients by different percentages at the same time, it is almost impossible to track your progress.
Have fun with it, and don’t be afraid to get your hands sticky.
Cooking in a time when the food supply chain is strained can present some challenges. Some of us are trying to avoid the grocery store all together, others are still going, but having trouble finding pantry staples. With all that in mind, I wrote the following recipe (including a lot of tips on substitution) for the MVTimes.
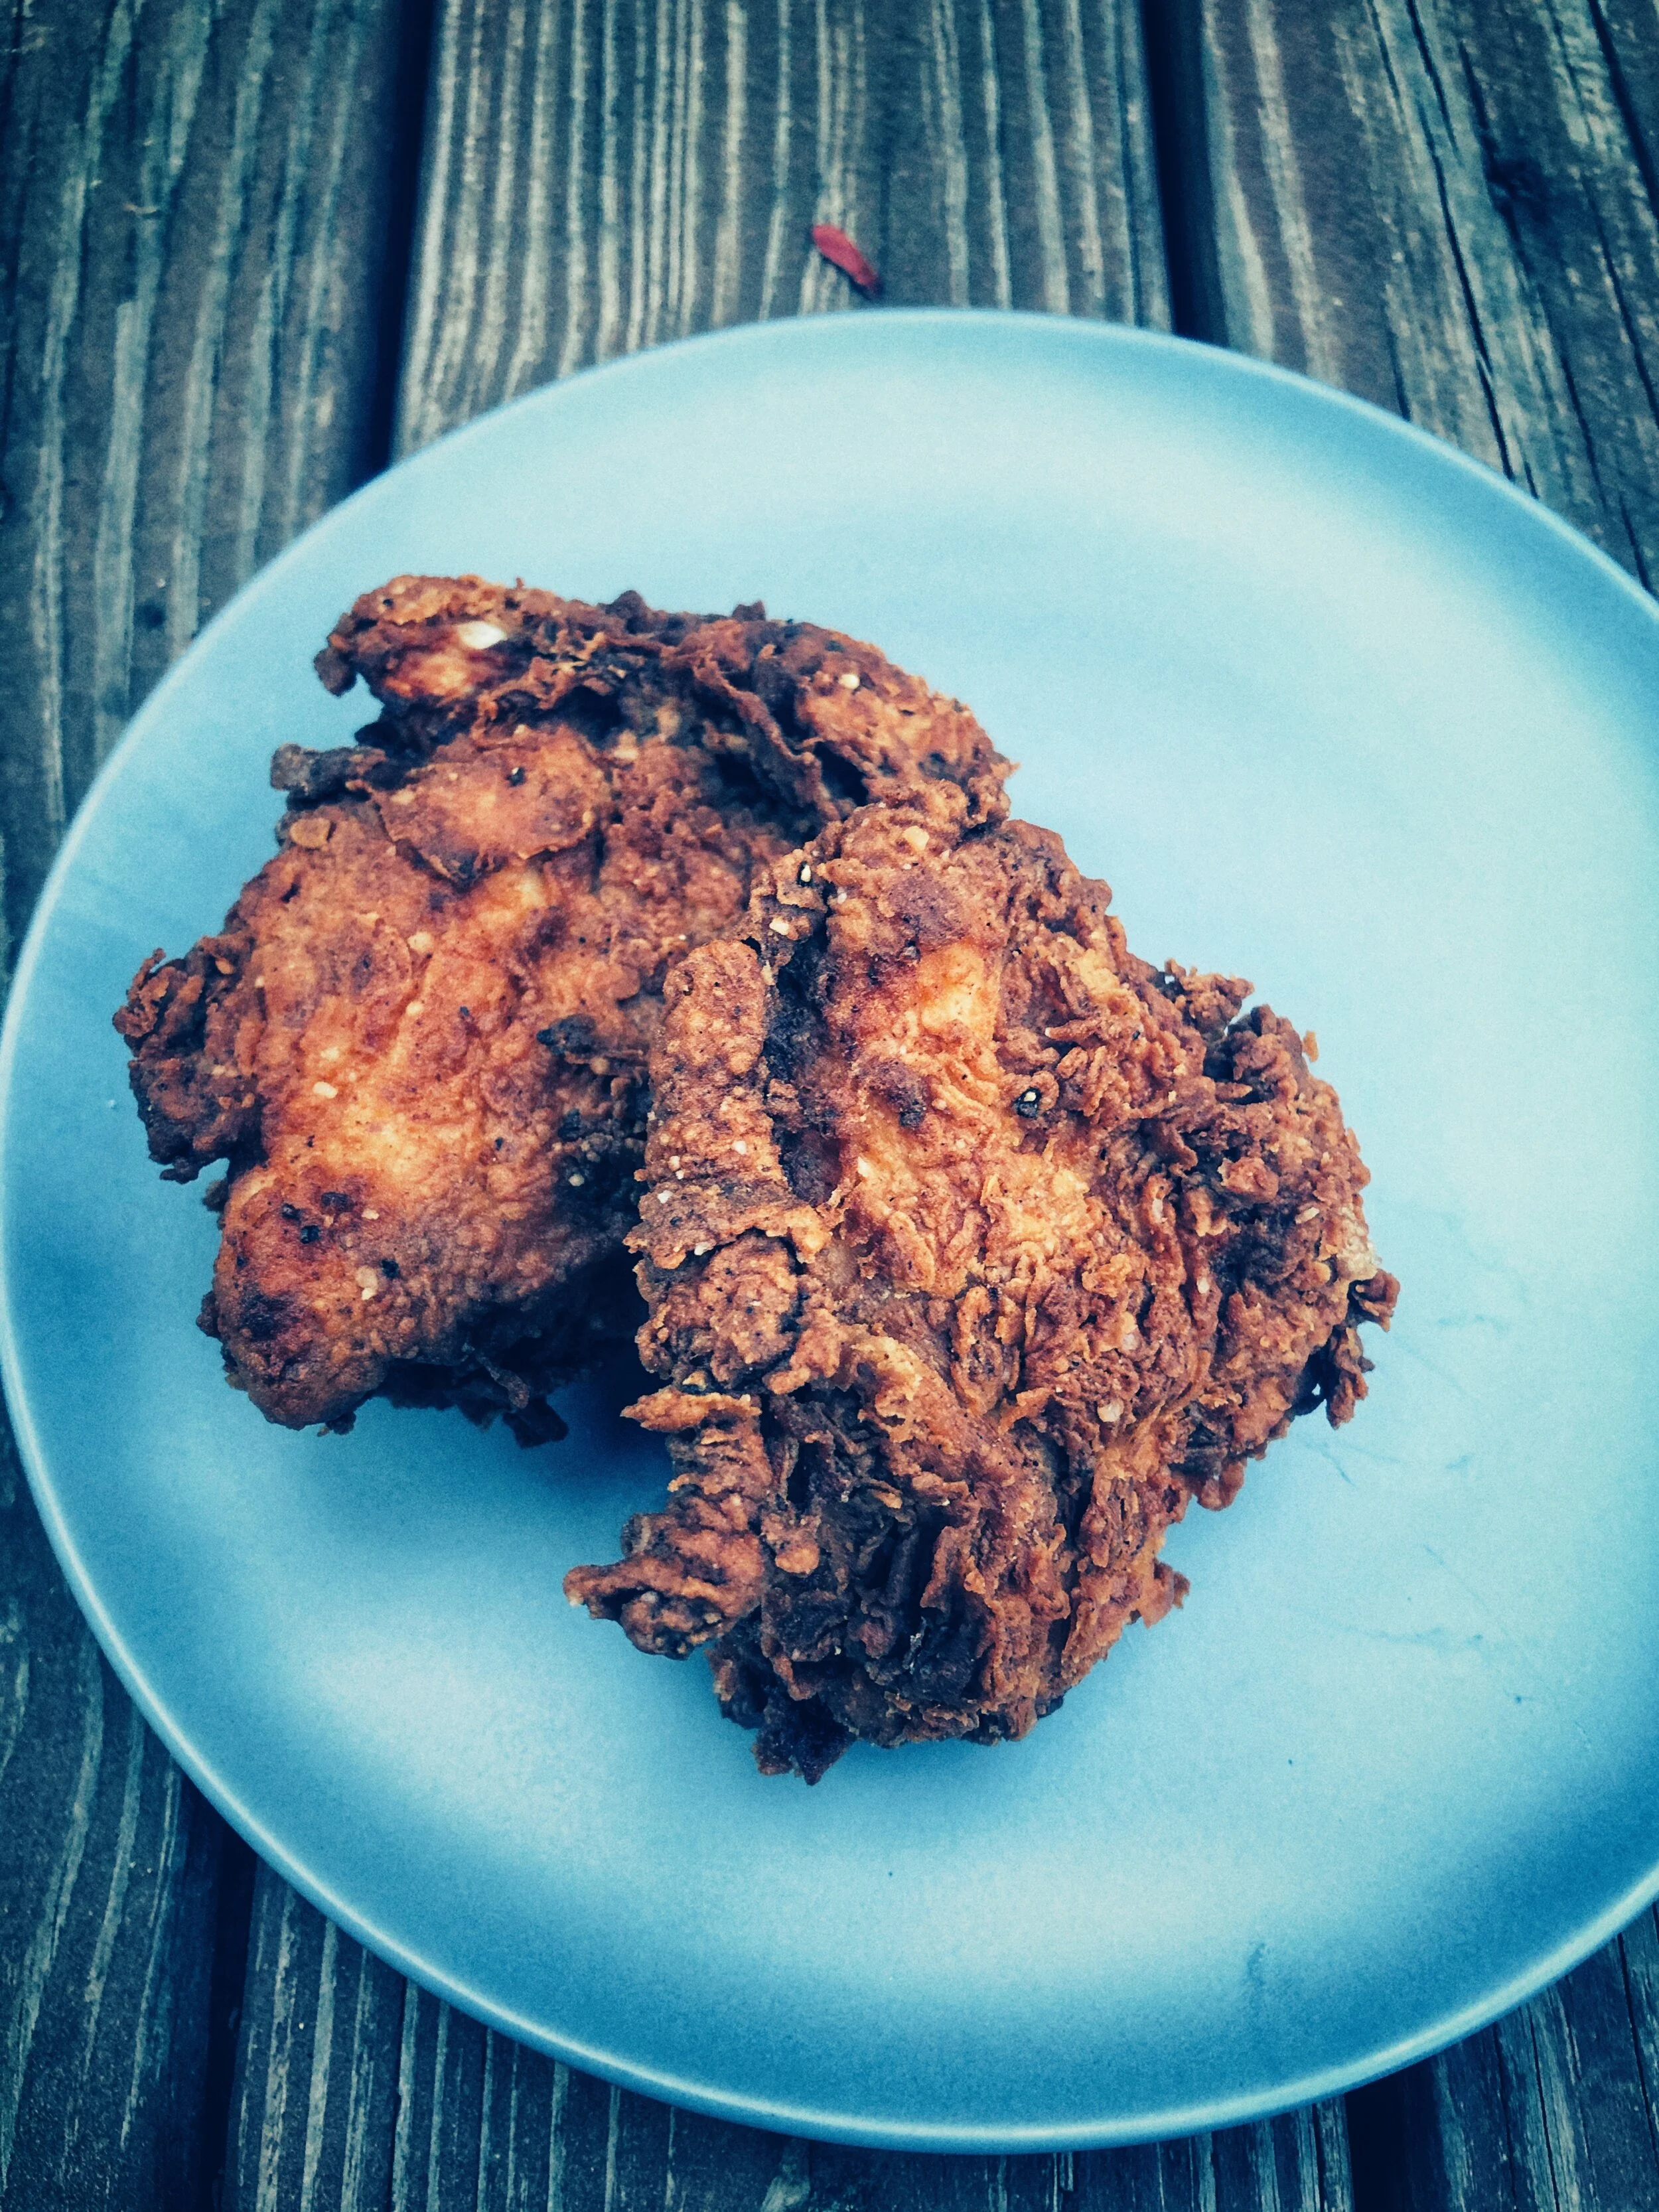
A few years ago I had the pleasure of working with Chef John Wilson of Water Street Kitchen in Woods Hole. In the off-season most Island residents scramble to find what work they can, and as someone who isn’t afraid of a hard day's work, I decided to commute across Vineyard Sound for a bit. During my time at Water Street Kitchen I came to appreciate fried chicken like I never had before. Of course I had made fried chicken before, and even spent a few years living in the South (the comfort food epicenter of America), but my love for fried chicken was cemented during my time at Water Street that off-season.
Every Wednesday, John cooks up a fried chicken meal inspired by cuisines from around the world, complete with flavorful sauces and thoughtful sides. I spent many Tuesday nights, after service, breaking down whole chickens and marinating them in various brines, and buttermilk concoctions. It opened my eyes to the diversity in crusts, flavor profiles, and overall deliciousness that fried chicken has to offer.
So let's get to the point. We’re all living through a pandemic, and some of us have all-purpose flour, while some of us are searching desperately for an online retailer that isn’t sold out — myself included. Allow me to first tell you that you don’t need all purpose flour for delicious and perfectly crispy fried chicken (or most fried things for that matter). In fact, you probably get the crispiest result using corn starch. You can use wheat flour, self-rising flour, most flours really. Be sure to check the freshness of your flour. If it has a rancid, or off-putting smell that will come through in a pretty profound way when you deep fry it for several minutes. You can mix rice flour and cornstarch, get creative . . . Again it’s a pandemic, all bets are off, rules are falling by the wayside, and we have the time to experiment.
Classic recipes in the U.S. call for buttermilk as the prefered first dip, creating a nice coating for your flour to stick to, and it works beautifully. But what if you don’t have buttermilk? Yogurt works very well, you can dilute it a bit if you like. Milk does well if you add some acid to it and allow it to curdle first. Non-dairy “milks” like almond milk also work well if you add some egg to it. Again, there are no rules, work with what you have.
You can fry lots of things in the “chicken” style. As a kid we often visited the little town in Kansas where my father grew up. There was at that time one restaurant in this tiny town, and their specialty was “Chicken Fried Steak.” Fire up your imagination and fry tofu, pork, or the Onaga Kansas favorite steak.
Basic Fried Chicken
Ingredients
Chicken: Whatever cuts you can get your hands on. Smaller pieces like tenderloins take less time.
Frying oil: Neutral oils of most kinds work (vegetable, canola, grapeseed, safflower, peanut, etc.) You can reuse this oil for frying if you strain it, and store it properly.
Marinade
Buttermilk (or alternative) enough to cover (approx ½ cup per lb.)
Salt (aprox ½ tsp. per lb.)
Black pepper- dealers choice
(Optional) Additional spices ie. cayenne, curry spices, cardamom, chipotle adobe, whatever floats your boat.
Dredge (dry ingredients):
Flour (roughly a cup per lb… you can make more as you go)
Salt
Spices (approx ½ -1 teaspoons total per lb.) Garlic powder & paprika are traditional additions to classic buttermilk fried chicken, but you can get creative here as well.
*A note on baking powder. Some recipes call for it, I am not opposed to it, however if you are using self-rising flour it already has a leavening agent in it. This addition will help achieve an extra crispy crust. If you want to add it use approx. 2 tsp. per lb.
Method:
Place chicken in a sealable container, cover with marinade ingredients, and refrigerate for at least an hour (overnight is best).
Preheat oil to 350 F. Use a heavy-bottomed pot, and leave plenty of room for the chicken as the level will rise. Keep in mind that the oil will boil up, and over the sides of your pot if you do not use a large enough pot, or leave enough room by adding too much oil.
If you don’t have a thermometer you can test the oil by putting the end of a wooden
spoon into the oil. If it bubbles steadily, the oil is roughly the right temp. If it boils wildly, it is too hot. If it doesn’t bubble it isn’t hot enough.
While the oil is heating up, set up your dredging station.
Mix dredging ingredients in a large shallow bowl or casserole. And place it near your frying oil.
Place your chicken on the outside of the dredging ingredients furthest away from the oil.
Once the oil is hot and ready to fry, it's time to dredge.
Remove the chicken from the buttermilk one at a time.
Cover completely in flour mixture.
Dip the chicken back in the buttermilk, letting the excess liquid drain back into the container.
Put the chicken back in the dredge, covering the chicken very well (you can push it into the flour a bit for a thicker crust alla Popeyes).
Repeat the breading process with all of your chicken pieces.
Once it is out of the dredge, carefully and slowly lower the chicken into the oil. Be careful not to drop it into the oil. If you slowly introduce the chicken into the oil it will not bubble as vigorously in the first few minutes of frying.
It is ok to fry the chicken in batches if you don’t have much oil.
Cook the chicken for about 10-15 minutes (depending on size), being careful to move it around the oil. If you are using a small amount of oil, the crust tends to burn close to the heat source if it isn’t turned regularly.
If you have a thermometer you are looking for an internal temp over 165 degrees. If you don’t and you are not sure, you can carefully cut a piece open to check.
Place the chicken on something to allow the oil to drain (I didn’t have a rack so I used a muffin tin).
Let it rest for at least 5-10 minutes, or serve cold
Now that you have successfully made fried chicken you can top it with whatever you like. Personally, I am a big fan of honey and hot sauce, though that is probably influenced by my time living in Georgia. This is another opportunity to use some pantry ingredients or premade sauces to bring another level of flavor to your chicken. Barbecue sauce, yogurt based sauces, vinegar based sauces, the sky's the limit. Get creative and make yourself some comfort food.
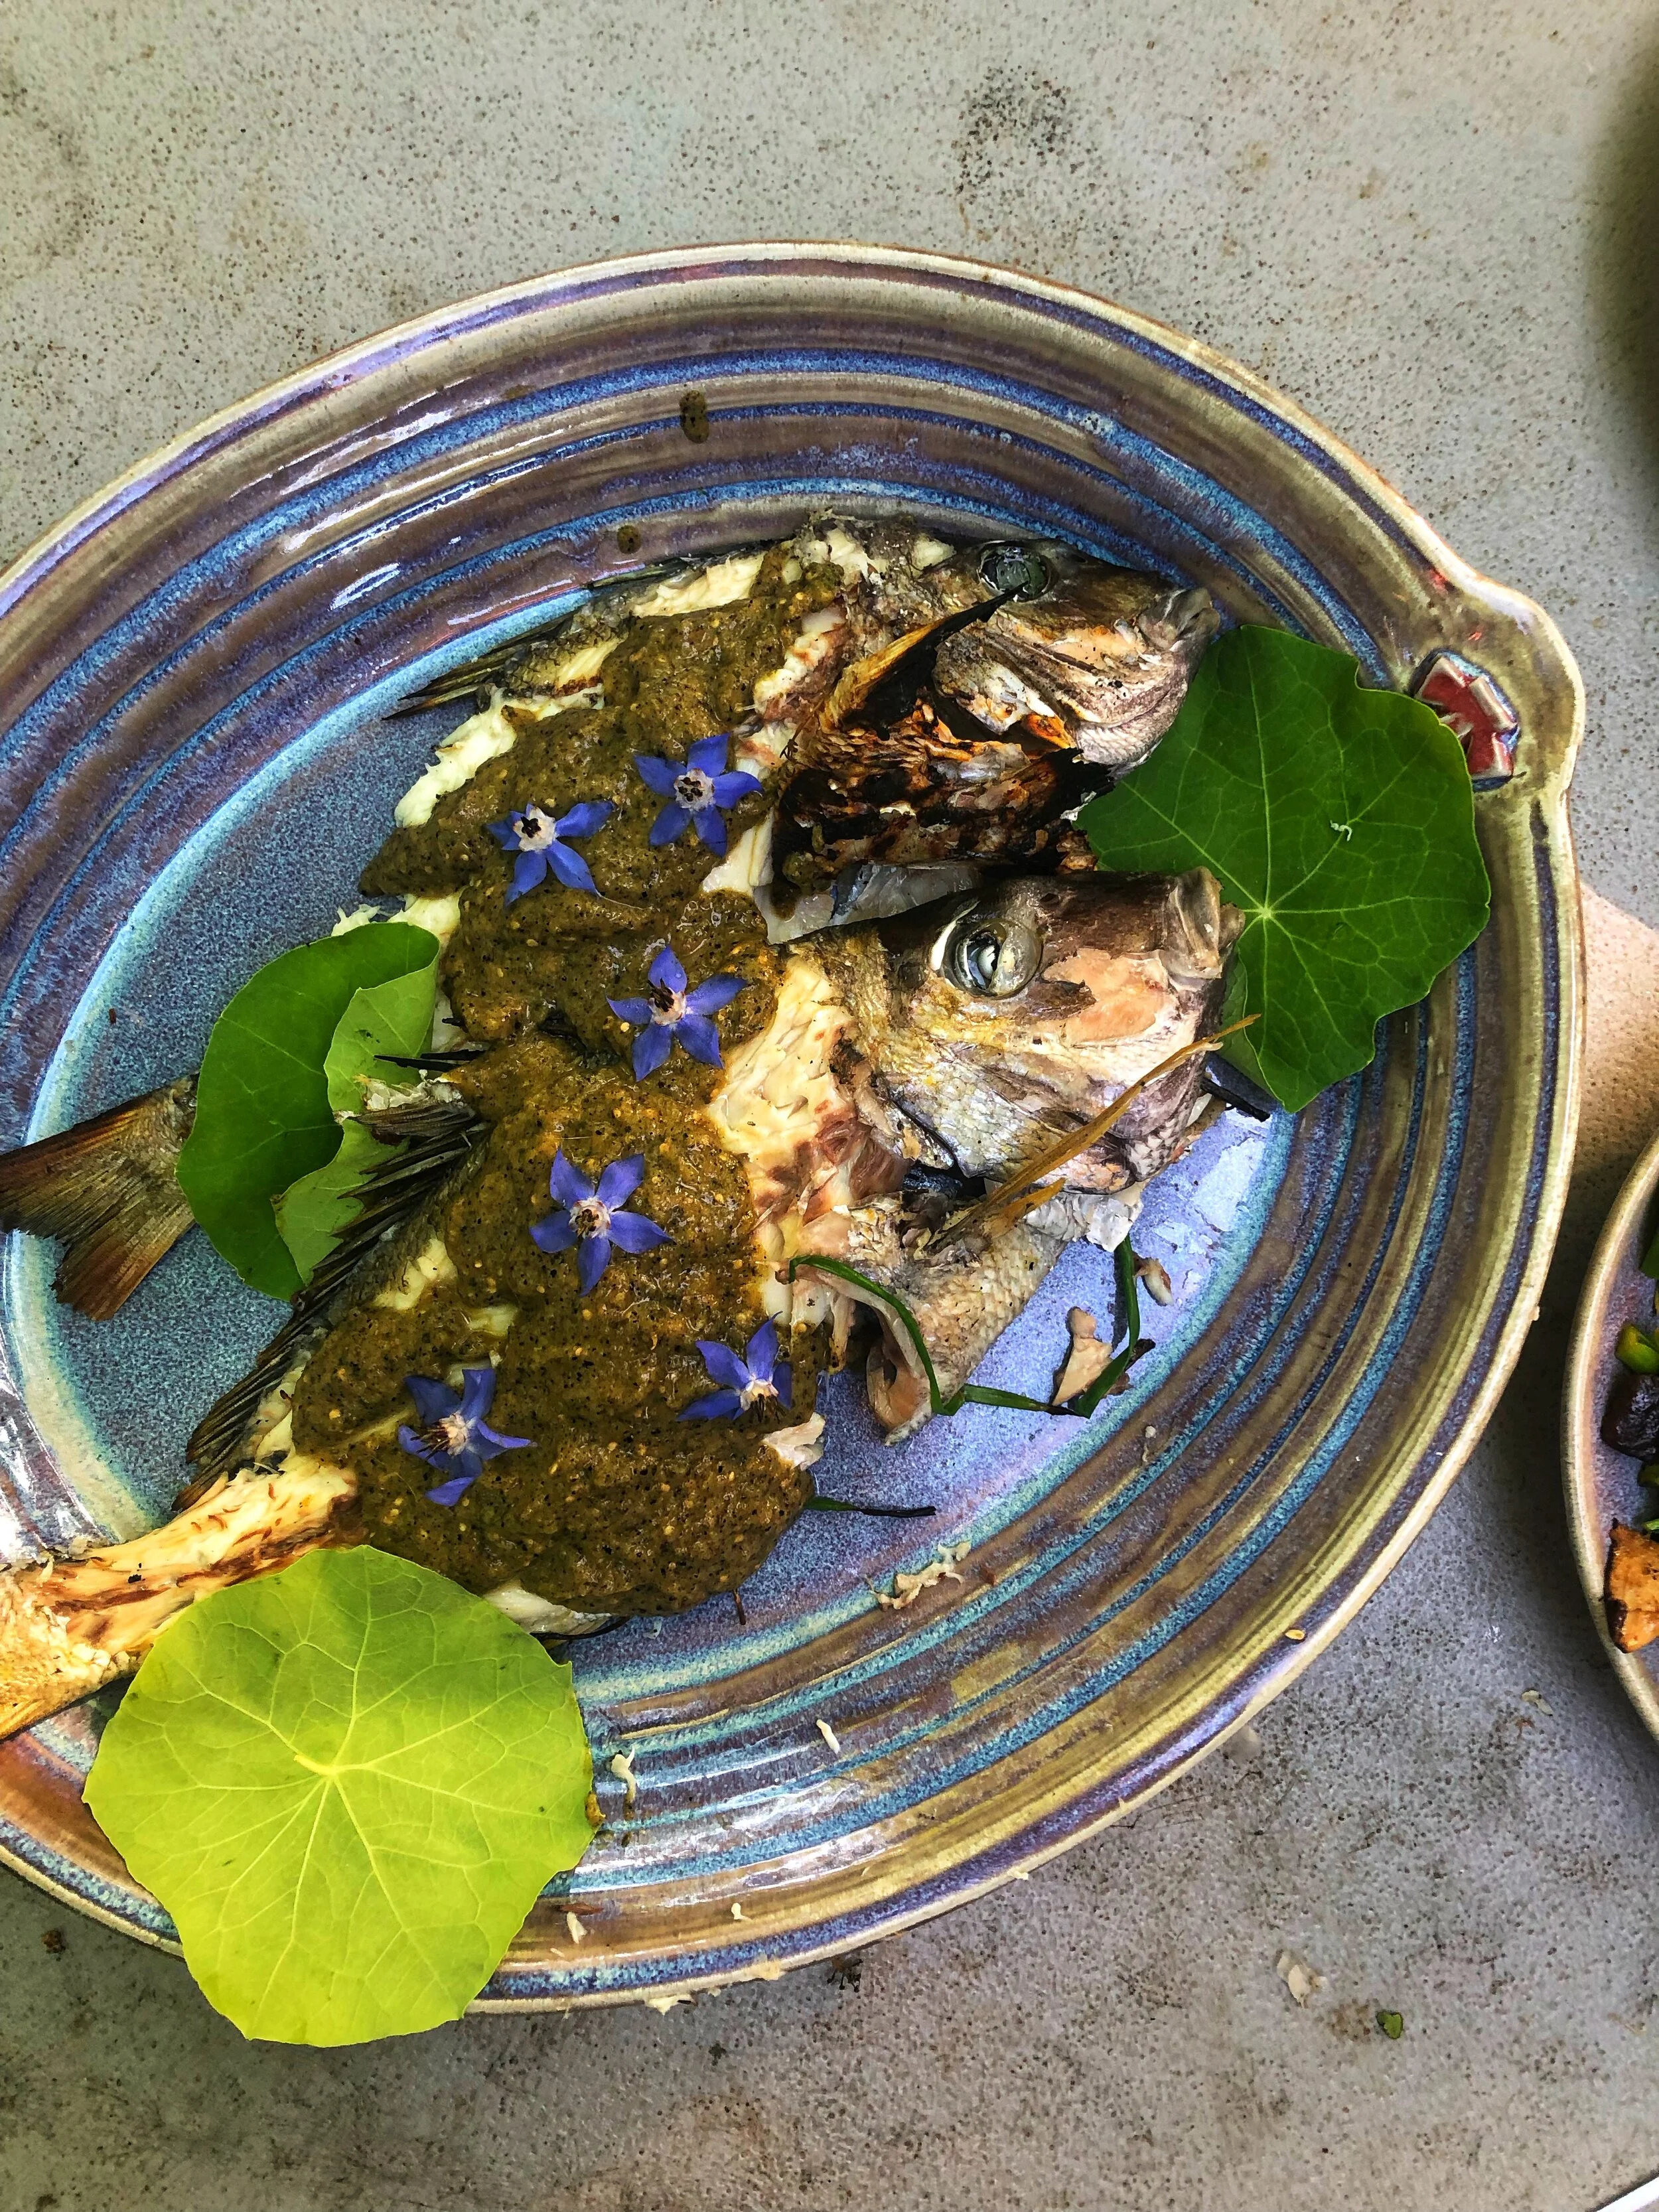
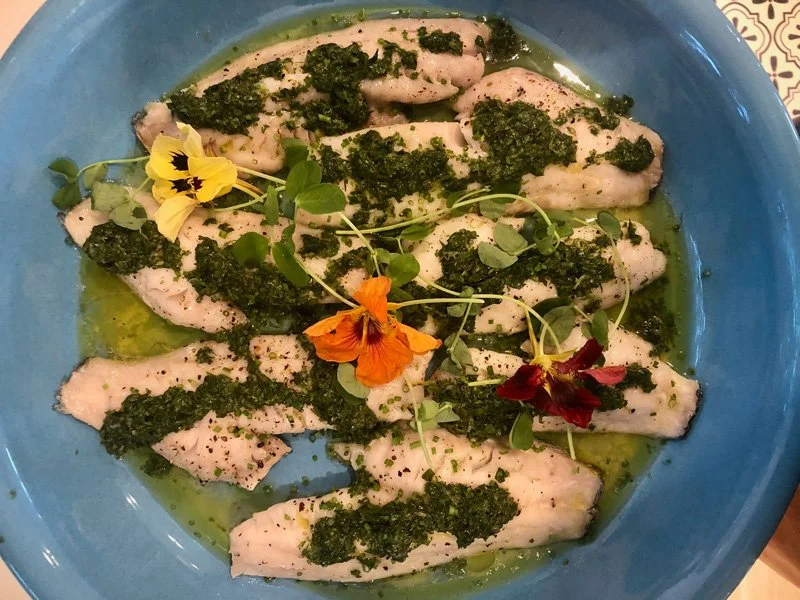
Scup are an abundant and easily caught resource on Martha’s Vineyard. Many people avoid them, as they are certainly not a sport fish, and they are full of bones. But the meat is absolutely delectable, and well worth eating! The following is a recipe I submitted to the Martha’s Vineyard Times.
This week I didn’t get out fishing much. With only one day to wet a line, and the ambition to cook my catch, my friend and I set our sights on bluefish. We did quite a bit of moving around, but never got into the blues. We did however manage to catch a couple of beautiful scup.
Cooking fish whole is a lot less work than fileting, especially when working with smaller boney fish like scup. Scup collar and cheeks are delicious, but are very small and are a lot of work to cook separately for a little payoff. Cooking the scup whole allows for you to enjoy these treats without taking the time to cook them separately. Scup is an abundant resource on the Island, and in my opinion is vastly underrated. They are sweet, and light with a very mild flavor.
Grilled Whole Scup with Tomatillo Sauce
Fish Ingredients:
1 whole scup (guts removed)
2 tsp Olive Oil
½ tsp Salt
2 inch piece of ginger sliced thin
1 lemon sliced into thin rounds
1 bunch Chives
Neutral oil (for brushing grill grate)
Tomatillo Sauce:
8-10 tomatillos
1 large red onion sliced into thin rounds
1 bunch cilantro
2 Tbsp Olive Oil (plus a little to brush onions)
2 tsp sherry Vinegar
2 tsp honey
For the Tomatillo Sauce:
-Heat your grill to a medium high setting
-Brush onions with olive oil and a pinch of salt
-Place onions and tomatillos directly on the gril
-Cook tomatillos until the color darkens, and the juice inside begins to bubble
-Cook onions until they are visibly charred and begin to soften
-Combine all of your ingredients in a large blender (I prefer a Vitamix or other high powered blender)
-Blend until smooth, taste for sweetness and salt (if you would like a little more sweetness add honey)
For the Scup:
-Turn your grill down slightly to a medium heat
-Stuff the body cavity with ginger chives and lemon
-Coat the outside of the fish thoroughly with olive oil and salt
-Brush the grill grate with neutral oil (This helps keep the skin from sticking)
-Place the whole fish onto well oiled grill surface
-Cook for 5-10 minutes per side depending on the size of your scup
-Use a thin fish spatula to turn the fish ( a thick spatula will damage the skin, and flesh)
-Place your whole fish on a plate or platter, and cover with tomatillo sauce.
-Enjoy!
Scup have quite a few bones, and are often thought of as “too much work,” but I assure you it’s worth the effort to eat around the bones. I have adopted the technique of pulling the flesh away from the fish in the direction of the bones making them easier to spot.
Recipe originally appeared in the Martha’s Vineyard Times

Growing up, my family had several recipes that appeared at every holiday feast, none of which I will be sharing with you. Not because they are particularly good, or something I keep close to the vest. But because they are all dishes that are outdated in style and frankly unhealthy. I have distinct memories of visiting my great aunt’s house in central Kansas. Even in the early nineties they would still serve things called “Jello salad” that contained cream cheese, canned fruit, canned beans and mushrooms, really anything out of a can. Pour these concoctions into a pound cake mold with some flavored gelatin, and like magic you have dishes like the infamous “Under the Sea Pear Salad.” Nothing seemed off limits in these gelatin creations, canned olives, even canned fish. There were casseroles mounding with frozen vegetables, velveeta and butter toasted ritz crackers. The ironic thing is we were deep in the heart of farm country but fresh vegetables were never on the table. All of the farming in that area was commodity grains, soy, and sunflower by the time I was a kid.
These days we spend Thanksgiving with my wife’s family in central Massachusetts, or “metro west” if you are my wife. Several years ago, I was asked to prepare some brussels sprouts for Thanksgiving dinner. Every Thanksgiving since, I have been asked to cook brussels sprouts. Christmas came, and I was asked to cook more brussels sprouts. Now I cook brussels sprouts for every family holiday. In an effort to keep things interesting I often prepare them in different ways. If you would like to try something a little different at your holiday feast this year, this recipe went over wel,l and I have been asked to share it several times.
Ginger Brussels Sprouts
Ingredients:
-1 lb. Brussels Sprouts (ends trimmed, cut in half lengthwise)
-3 inch piece of fresh ginger (peeled and diced small)
-3 Tbsp Coconut Amino (or sub w/ low sodium tamari)
-1-2 Tbsp Honey
-2 tsp Rice Vinegar
-3Tbsp Extra Virgin olive oil
-Salt
(optional toppings- Lime zest, sesame seeds, cilantro, lime juice)
Method:
-Preheat oven to 375 degrees F
-Coat a large heavy skillet with olive oil over medium heat
-Once oil is hot place brussels sprouts cut side down in the pan
-Sprinkle with salt
-Allow brussels to brown before stirring (if you have a small heating element you may need to move the brussels around the pan to make sure they all brown evenly)
-Add fresh ginger then stir pan
-Cook until aromatic (30-60seconds)
-Add rice vinegar, coconut amino and honey
-Stir pan to coat all of the brussels sprouts evenly
-Move skillet to the oven for 3-5 minutes (Brussels should be tender but firm)
-Serve with desired toppings
text originally appeared in the Martha’s Vineyard Times

Every year I try to do something new to better myself. Last year I took a long road trip and staged with a chef that I admired. This year I’ve already visited nine new countries and made my fifth visit to Nepal, a country near and dear to my heart. I arrived home last week, and am still dreaming about all of the delectable things I ate, the indescribable pieces of fine art and architecture I admired, the familiar feelings of kindness and impatient sarcasm that are reminiscent of home — even in an unfamiliar place.
For Valentine’s Day, while on our trip, my wife and I decided to do a one-on-one pasta class with two seasoned chefs who currently work in an artisanal pasta shop in Rome, Italy. Pastamaking had also been on my list for the New Year; it was a skill I was hoping to hone, and what better place to learn more about it than Italy?
Our pasta pros, Lele and Natalie, met us at the stairs of an old church outside the city center, and we immediately hit it off. First we stopped at the local farmers market and picked up some fresh produce. Next we stopped at a little cheese shop to purchase some fresh buffalo mozzarella, as well as some hay-smoked mozzarella to fill ravioli. From there we visited a natural spring owned by the Vatican to bottle water, then we headed to Lele’s home to get to work.

My wife had never made pasta before — I have spoiled her into almost never having to cook. I had previously made pasta, but learned a great deal about technique from these two kind, pasta-loving souls. In preparing my dough I have always tried to incorporate the full quantity of all of the ingredients, and knead the dough rather forcefully until it became smooth. I learned that both of these things are incorrect.
When folding the dough and kneading, the goal is to create tiny air bubbles throughout the dough. It is important to become more and more gentle as the dough becomes smooth. Natalie used only his thumbs, folding the dough in half toward himself, then rolling it gently away from himself with just his thumbs. “It is important to keep the crease in the same place, and work around it as you knead,” he said. This knowledge was invaluable.
It is always interesting to find the misconceptions we have as Americans eating food we consider to be from a specific ethnic tradition. When I traveled to China several years ago, I encountered many amazing cuisines, none of which were anything like what you find at a “Chinese” restaurant in the States. Lele told us about a private dinner he was hired to cook in Los Angeles. He told us that when the guest asked him to cook “garlic bread” and pasta with “marinara,” he genuinely didn’t know what the man was talking about. “In Italy, we don’t eat garlic like that; we may put it in the oil, but we never eat it. And marinara only exists with pizza.” To Lele, things like carbonara are “sacred,” and he was kind enough to share the traditional method with us. Simply guinchale (Italian cured meat from pork cheeks), young pecorino, eggs, and a generous portion of fresh cracked black pepper. When put together properly, these ingredients come together to make the perfect sauce, no cream needed.
Of course the basic ingredients of your pasta are critical too. When you make pasta, use all-purpose or “00” flour, semolina, and roughly 50 percent of the volume of flour in water, eggs, or really any liquid (other than oils).
There are two basic doughs, a water-based and an egg-based dough. From there the sky’s the limit. But mastering these basic doughs takes more than a weekend class. Natalie spent over a year studying the art before becoming a teacher himself. “It depends on so many things, humidity, temperature, if the windows are open … 1 percent plus 1 percent plus 1 percent … equals 10 percent,” he said. “It is very simple, but it is easy to mess it up by overworking the dough, or letting it dry out by adding too much flour.”
To get you started making authentic pasta dough, I’d like to share this simple recipe for Malloreddus, or “gnocchetti sardi,” that Lele and Natalie shared with us:
Water-based pasta: Makes 1 generous portion of malloreddus
Ingredients:
70g all-purpose or “00” flour
40g semolina
50g water (a little less than ¼ cup)
Method:
Measure out all-purpose flour and semolina in a flat-bottomed bowl. Make a “volcano” by mounding the flour in the center of the bowl and pushing down with your knuckle in the center and turning your fist. Use the depression in the center to fill with the water.
Begin mixing by hand. As the dough begins to form, it will start to leave small clumps of dough behind, and there will be excess flour at the bottom of the bowl. At that point, grab all of the formed dough, leaving the flour at the bottom of the bowl behind, and transfer it to a lightly floured surface (the water will only take the flour it wants to absorb, do not force it to take extra).
Knead the dough by folding it in half toward you, placing it on the surface and gently rolling it away from you. Turn clockwise and repeat folding and kneading away from you.
As the dough begins to smooth out and gluten forms, it will have more resistance. It is important to be more and more gentle as the dough becomes smooth, because you are trying to incorporate small air bubbles into the dough as you fold.
Once the dough becomes smooth and it has some light spring to it when you press your finger to it, it is ready to rest. (Some recipes say “knead for 10 minutes” because of factors like humidity and air temperature — it may take four minutes, it may take 10, just know you are done when the dough is nice and smooth, and there is a light spring to it.) Cover dough with plastic (preferably something reusable). Let rest for about 20 to 30 minutes, until gluten structure relaxes a bit.
Cut the dough ball into four equal pieces (if you’ve kneaded correctly, there should be tiny air bubbles throughout the dough). Roll each dough ball section into a log, and roll it from the center out until it is a uniform thickness of about ⅜ inch. Work the dough gently, as you don’t want to rip it.
Cut these into roughly square shapes by cutting each “rope” in half, over and over, until they are roughly square.
Use the back of a fork to press the back of your thumb into the dough and roll it off the fork without rolling your thumb, but rather pushing it straight across. “This pasta was designed to flick off the fork.”
Coat the pasta with a dusting of semolina as you finish shaping it, so they don’t stick together.
Let dry for several minutes, then cook to desired doneness (one to three minutes, depending on thickness).
This text also appeared at mvtimes.com

Chefs have a long tradition of “staging” (pronounced more like stodging), in which you go and work in a kitchen with chefs you would like to work with, or learn more from. It is almost always unpaid, and requires all of the demand of being an employee of that restaurant. Last winter I reached out to Zach Meloy at Better Half restaurant in Atlanta. I had admired his whimsical food for years on Instagram, and hoped that he might have room for me to spend some time in the kitchen with him and his team. My wife and I were preparing to spend a month in Atlanta, and she encouraged me to reach out to him to see if I could stage alongside him and his staff.
I sent him an email, and was thrilled to receive a reply almost immediately. He told me I was welcome to come in and we’d “see how it goes.” I was there for no more than five minutes when he asked me to make chili from scratch for the staff pre-shift meal. I only had half an hour, so I concocted the best version I could in the allotted time, then jumped in to lend a hand prepping for dinner service. Zach approached me shortly after, and told me that I was welcome to cook with them as long as I wanted. It was a great feeling to be welcomed into their kitchen, alongside talented chefs I had admired and respected for so long.
Every chef has a different vision, a different approach, or a different touch, and I think it’s important to see what others are doing and share ideas. I learned a number of things during my time at Better Half, and I had a blast working with one of the tightest teams I have seen in a kitchen in years. As a private chef, I am often cooking alone, so I especially value the opportunities to be around, and be inspired by, other chefs.
One of the foods that really stuck with me from my experience at Better Half was a chipotle potato gratin with Cotija cheese. Late last season, after preparing potatoes as many ways as I could think of, I decided to recreate the dish with a few twists. Using Mermaid Farms’ Feta Style cheese (which is absolutely delicious), and some local sweet potatoes, I put my own spin on this amazing side dish. It’s the perfect comfort food for a cold winter night, and the flavor combination is unlike most things you’ve tried before.
Ingredients:
4 to 6 sweet potatoes
1 cup heavy cream
2 to 3 cloves garlic, grated
1 can chipotle in adobo (use adobo only, reserve peppers for other use)
1 cup feta (Mermaid Farms, when you can get it!)
Fresh lime zest (optional)
Method:
Using a mandolin, thinly slice the potatoes (be careful). In a medium-size casserole, make a uniform layer of potato slices shingled together. Cream together cream, garlic, and adobo. Spoon a thin layer of the cream mixture evenly over the potatoes, then sprinkle on some feta. Repeat layers in alternating directions until all of the ingredients are used.
Bake at 375° for 45 minutes to an hour, until a knife slides into the center easily (use knife to check doneness). Let cool before cutting to preserve the layers.
Serve with fresh lime zest.
This text also appeared at mvtimes.com

Every year around the holidays my father would dig through the cupboards for his hefty ceramic shortbread molds. He carefully made dozens of shortbreads and portioned them into decorative tins for friends and family. Even after he moved down to Georgia, people would anxiously wait for the package of shortbread to arrive. When it was shipped or moved around from house to house, the crumbles would fall to the bottom; I always loved scraping the little bits of buttery shortbread out of the bottom of every tin.
As a chef I am always looking for ways to grow, and am in constant pursuit of innovative techniques and interesting new flavors. But sometimes it is the simplest of pleasures that bring the most joy. A smell or flavor can spark a memory so intense that it brings you back to another time and place. My dad’s shortbread is never too far from my mind, and has inspired me to create a version of my own.
Over the years I have made it my mission to use local products as much as possible, not because it is trendy to “eat local,” but because this Island is brimming with seriously amazing food. I am a private chef who serves different clients almost every day. That means different menus every day, so I began making regular visits to Island farms and the Farmers Market when I started my business. One afternoon, I was at Mermaid Farm’s booth at the West Tisbury Farmers Market when I realized there was Lost and Found wheat and rye flour from the Island sitting right in front of me. After discovering that grains are milled on the Island, my first step was to bake breads with it, but I wanted to do more. When I attended one of John Thurgood’s M.V. Wine Fest dinners several years ago, he incorporated a rye flour “cracker” that immediately brought me back to my own childhood.
I am a big fan of custard-like desserts, but feel they often need a bit of texture for balance. As I searched for the perfect bite to accompany a panna cotta, it suddenly dawned on me that I could put the rye flour cracker and the shortbread of my childhood together for a new, yet nostalgic crunch. I put together a simple rye flour shortbread, and crumbled it into little bits to sprinkle over the panna cotta. The same crumbly bits that I coveted as a child were now part of a refined dish.
I have since taken the basic shortbread and started incorporating cardamom brown butter, local honey, and other interesting flavors. This simple recipe is very easy to put together, and leaves a lot of room for creativity. I often bake these shortbreads as a large sheet cookie and break it apart, but it can be cut into shapes with a cookie cutter before baking if you prefer a more finished look. Top them with frosting, infuse the butter with herbs, or sprinkle in some maple sugar to make it your own. Crumble it on yogurt, serve with coffee, or add it to a beet salad for a little sweetness. I made some at a friend’s house recently, and it was eaten so fast it never made it onto a plate.
Ingredients:
1 cup butter
2 Tbsp. local honey
½ cup cane sugar
¾ tsp. salt (Martha’s Vineyard Sea Salt)
1¾ cup rye flour (Lost and Found Rye Sifted)
¾ cup all-purpose flour
¾ tsp. baking powder
Method:
Cream butter, honey, sugar, and salt. Sift flours and baking powder over the creamed butter and mix until consistent dough forms. If the mixture is too soft to roll, wrap it tightly and put it in the refrigerator until it is workable.
Roll the dough out onto a parchment-covered baking sheet. Bake at 375° until edges brown (check after 10-12 minutes).
This text also appeared at mvtimes.com

Fishing for bluefish is a blast. Bluefish fight vigorously when you hook them up and they are an abundant and often underused resource here on Martha’s Vineyard. For many years bluefish where considered by most to be practically inedible. My father in law, a life long fisherman from the cape, spent most of his life catching bluefish for lobster bait. Though they make excellent bait, I love to eat bluefish. As a chef I am often asked what to do with a fresh catch, so I would like to share with you a simple recipe to make your catch into a crowd pleasing dish that is truly delicious.
First things first, when you catch a bluefish make sure to bleed it immediately. When fish fight, or are put under stress, there is a buildup of lactic acid in the flesh which can “cook” or “burn” the flesh if it is not metabolized. With big game fish like tuna some fishermen will let the fish rest on the side of the boat before it is killed to allow the acid to be metabolized. The second reason to bleed and ice your fish as soon as possible is discoloration of the meat, and of course the fishy taste that is often associated with bluefish. Bacteria is harbored in the gills and guts of any fish, so it is important to gut and rinse the fish before you filet it. With bluefish I like to bleed, gut, rinse and ice them before I get home. Bluefish fillets should not be red if they are handled correctly.
Smoking is a great way to introduce people to bluefish. There are many smoking methods for fish, but I would like to share with you one of the simplest methods to get you started. Begin with a 50/50 salt and brown sugar cure for 5-6 hours. Simple pack the fish in the cure and leave it covered in the refrigerator. If you have one you can place a rack under the fish so the liquid drains away from the filets. This will draw a considerable amount of water out of the filets. Rinse the fish with cold water and pat it dry with a paper towel. Lightly salt the filet and let it rest in the refrigerator for an hour or two until a nice pellicle has formed (a thin film that allows the smoke to adhere to the fish). Drizzle a little maple syrup and your favorite spices on top of the filet and smoke them on low heat (150-200 degrees F) until the fish is dark and firm. The fish will be cooked in about an hour, but for the purposes of smoked bluefish we want to take that a little further and allow the fish to really soak up that smokey flavor.
Smoked bluefish can be eaten on its own, but the prefered method these days seems to be bluefish pate. While dining in new york, I had a smoked trout pate that used cottage cheese as its main ingredient and was blown away by how well it stood up to the flavor of the smoked fish. Here is a fun and easy recipe to make smoked bluefish pate at home!

Ingredients:
1 cup smoked bluefish (shredded)
¼ cup cottage cheese
2 Tbsp Sour Cream
2 Tbsp capers
1 Tbsp lemon juice
1 tsp horseradish
Lots of chopped chives, or garlic chives (1 whole bunch will not be too much)
Method:
Simply mix all of the ingredients together, season with salt and pepper to taste, and serve with crackers or freshly sliced cucumber. Feel free to experiment with proportions and add ingredients like mustard seed or soy sauce to make it your own!

On Martha's Vineyard we often only get to showcase our spring and summer vegetables. Fall harvest brings its own flavors, and is one of my favorites. As the temperature cools down the aroma of roasting vegetables and hot soups fill my kitchen. Butternut squash is versatile, inexpensive and packed with flavor. These squash also last for months if they are left whole. This simple soup is a staple in my kitchen.
Ingredients:
-3-4 medium sized butternut sqaush
-2 large white onions (diced small)
-3 tbs fresh ginger (minced)
-2 tbs curry spice
-2 cans unsweetened coconut milk
-salt & pepper to taste

-Cut the squash in half lengthwise, then scoop out the seeds and pulp
-Place the squash cut side up in a deep roasting pan with about 3/4 inch of water
-salt and pepper lightly
-Cover with aluminum foil, and roast in oven at 400 degrees until very tender (approx. 45mins to an hour)
-In a large stock pot soften the onions in olive oil over medium heat
-Once onions are translucent add ginger and continue to cook until fragrant (about 30 seconds)
-Mix in curry spice until onions and ginger are coated evenly
-Stir in coconut milk then remove from heat
-Scoop the squash away from the skin and add directly to stock pot (try to avoid the skin and veins)
-Return the mixture to the heat and stir until you have a hot consistent mixture
-Add salt and pepper to taste
-Blend the soup mixture using an emersion blender (or regular blender if you do not have one)

-This soup can be enjoyed with any number of toppings; bacon, croutons, fresh herbs, shrimp,
seeds, nuts, or on its own.
ENJOY!


Though I spend the majority of my time cooking in home kitchens, I love the hustle of a restaurant kitchen. On August 9th chef John Thurgood and I collaborated to make a beautiful five course tasting menu at the Beach Plum Inn and Restaurant. Though we sat down to build the menu nearly a month before the event, we left room to use the freshest ingredients. On Martha's Vineyard we are lucky to have over forty working farms, and available produce sometimes changes daily. Using the islands bounty and our imaginations we put together a five course tasting. August brings some of the hottest temperatures we see on Martha's Vineyard so we did not want to offer an overly heavy menu.
First up was a watermelon cucumber gazpacho with black bass ceviche, lemon basil, and grapefruit oil.
Next was a coddled egg with lightly dressed purslane, pickled komatsuna, and cured shaved egg yolk.
Then we served a seafood stew, with both smoked and steamed mussels, clams, squid tentacles, tomato, spring onion, and green coriander seeds in a lobster, and shellfish broth.
Next up was braised lamb, over a succotash of fave beans, green beans, turnips, black eyed peas and MVM shiitake mushrooms. topped with pea tendrils and lemon zest.
Last but certainly not least I made mini panna cotta over a strawberry, blueberry, and raspberry compote with crumbled mermaid farm barley cookie.
After careful planning and a quick team meeting service started strong at 6:00. We where two chairs short of selling out. With a strong team an evening like this goes very smoothly, and after spending years as a restaurant general manager I can tell you this small team was strong!
Stay tuned, as I plan to do more pop ups in the future!

watermelon cucumber gazpacho, black bass device, lemon basil, grapefruit oil
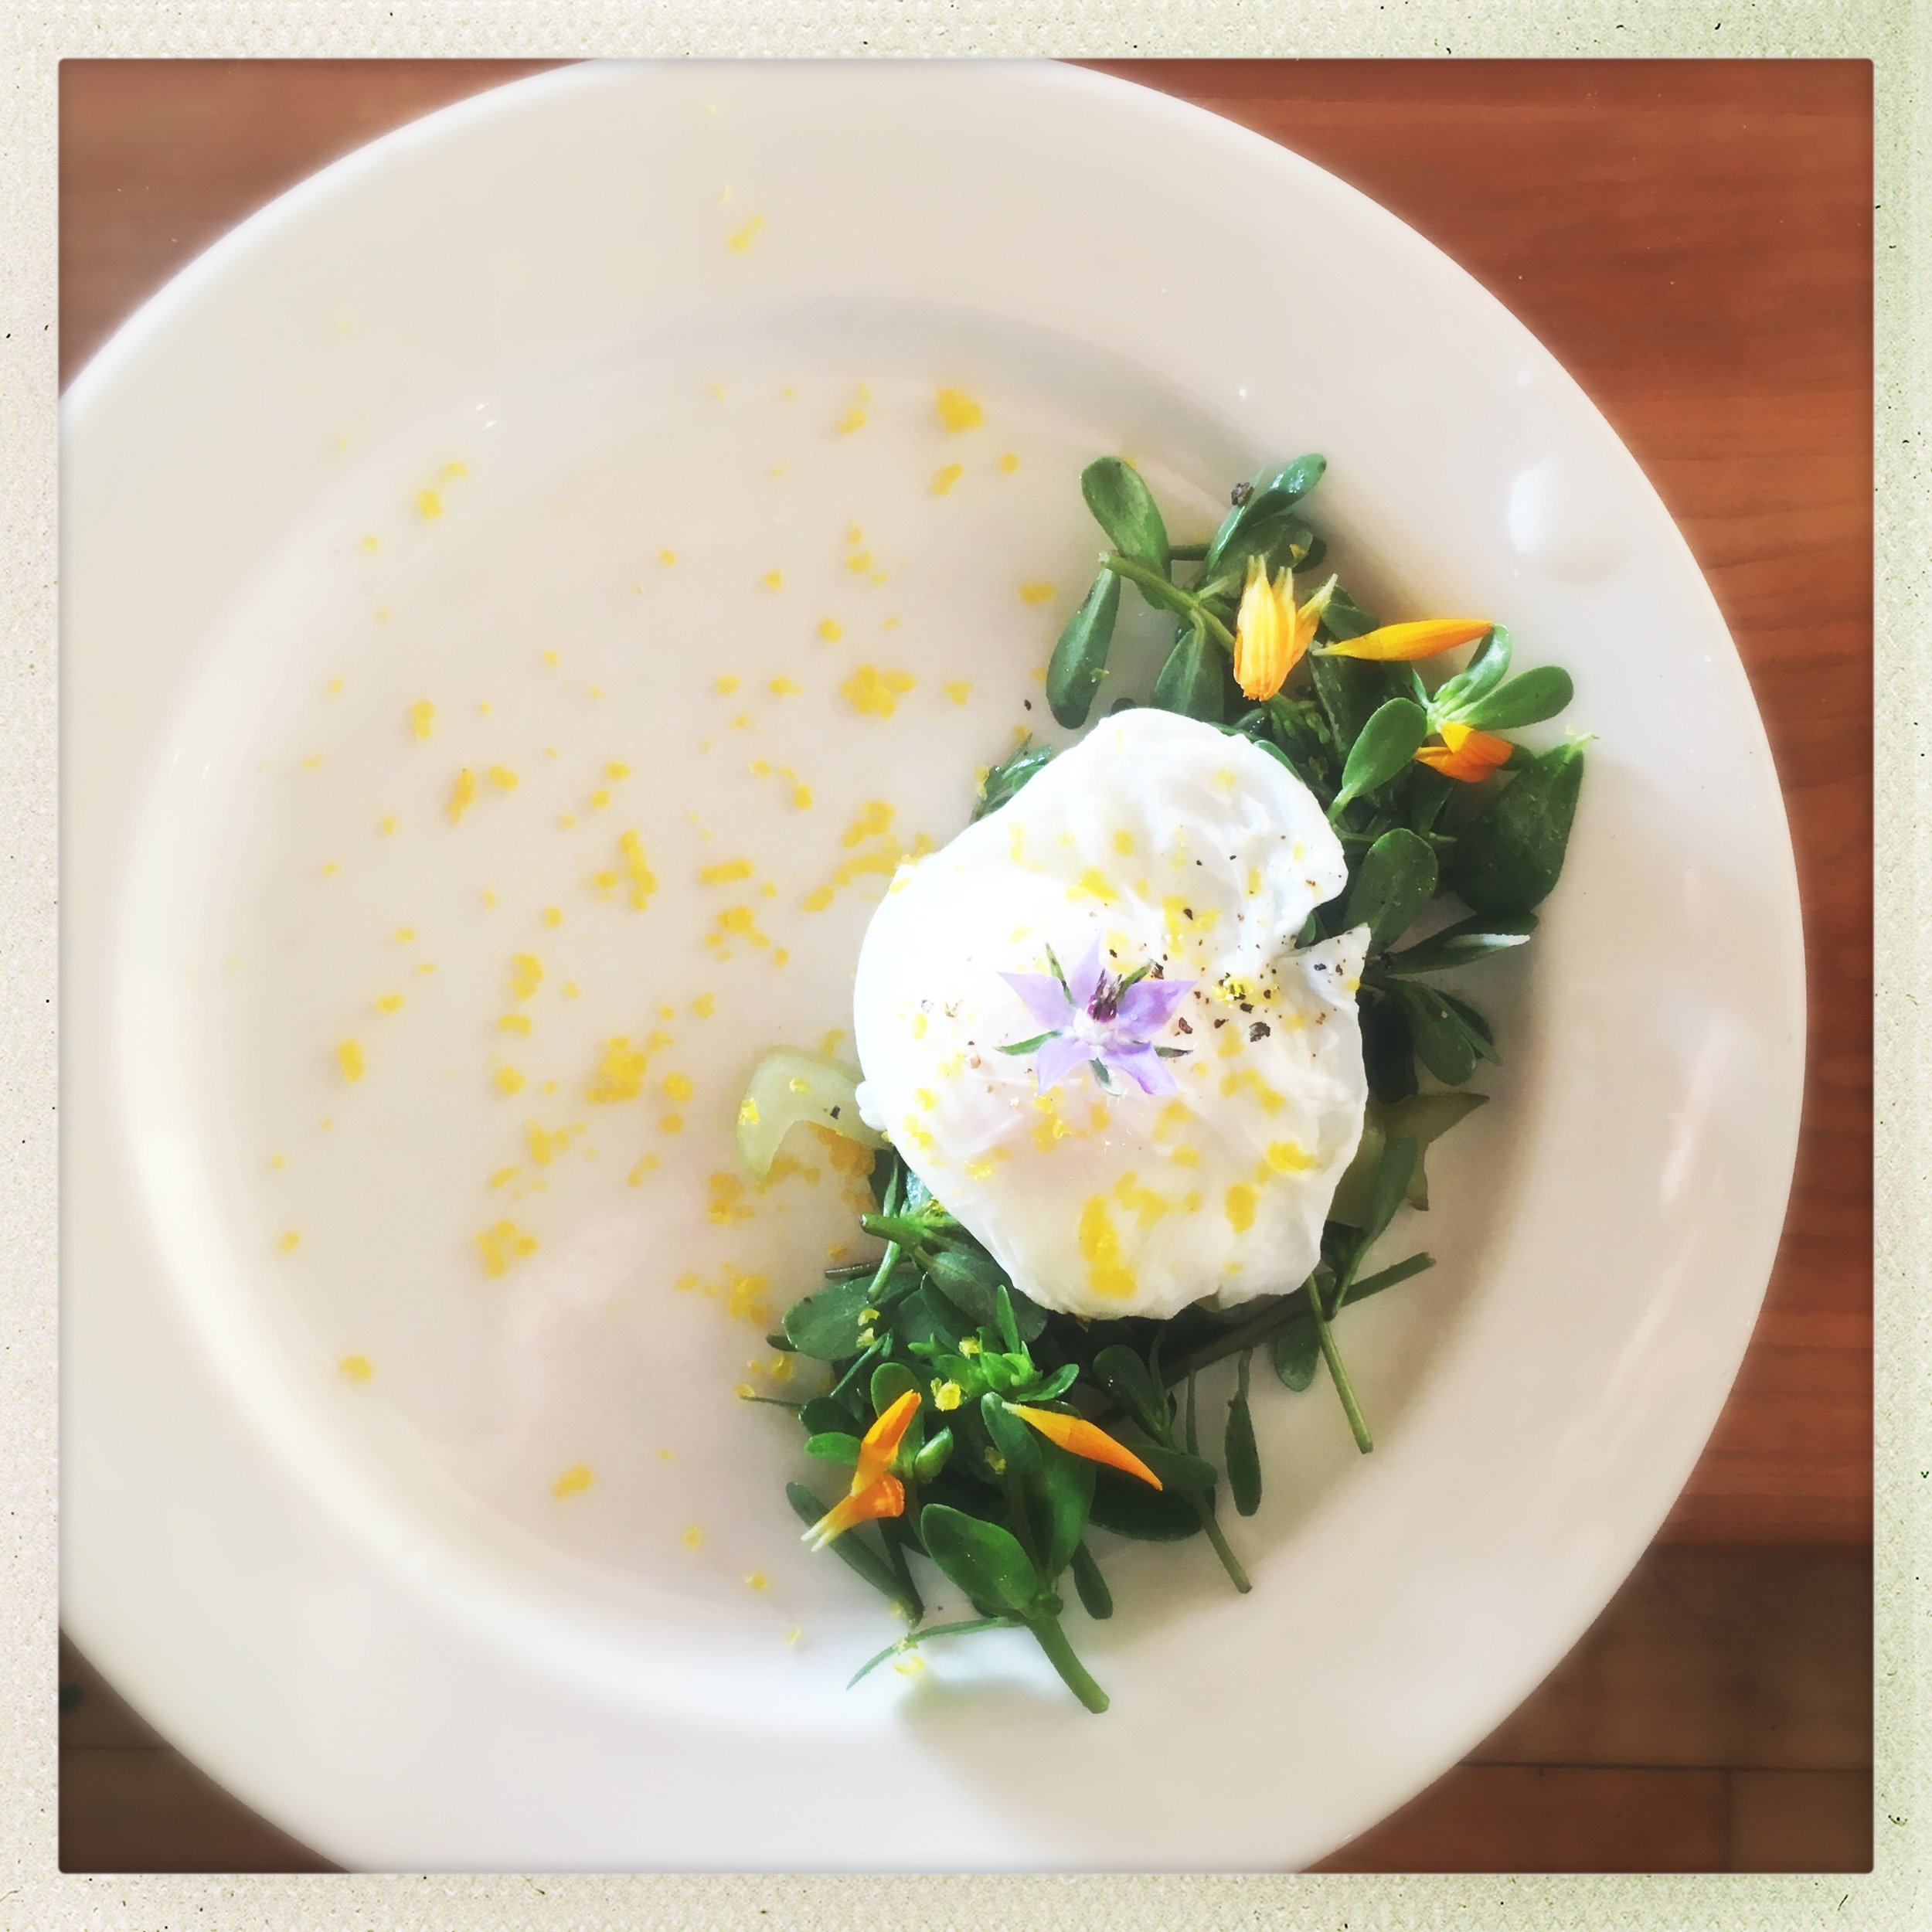
coddled egg, purslane salad, pickled komatsuna, cured egg yolk

Here on Martha's Vineyard we have access to some of the best oysters on the planet. Katama Bay is home to salty, sweet oysters that are equally amazing raw as they are cooked. While we have access to oysters year round, summer is ubiquitous with raw oysters. Classic mignonette can be found at every oyster bar, and is traditionally made with chopped shallots, vinegar and cracked pepper. The salty brine of the oyster is an amazing platform for acid, spice and sweetness. I have experimented with different mignonettes over the years and I find this one perfect for a summer evening.

Oysters can be an intimidating thing to work with at home if you have never opened them before. No need to worry, they are easy to open with a little practice, and can be a fun way to share time in the kitchen with your friends and family.
Oysters have two sides, the rounded belly side, and the flatter top. To properly open an oyster you will need an oyster knife and a towel. Some people also use a mesh glove on their non-dominant hand.
Place the oyster flat side up on a cutting board. Place the towel over it, leaving the end exposed.

Insert your oyster knife into the hinge, and push firmly holding the oyster still with your other hand. Wiggle your knife gently as you apply pressure into the oyster. Once you have a little purchase you can twist the knife breaking the hinge. Draw your knife along the inside of the oyster on top to release the mussel.
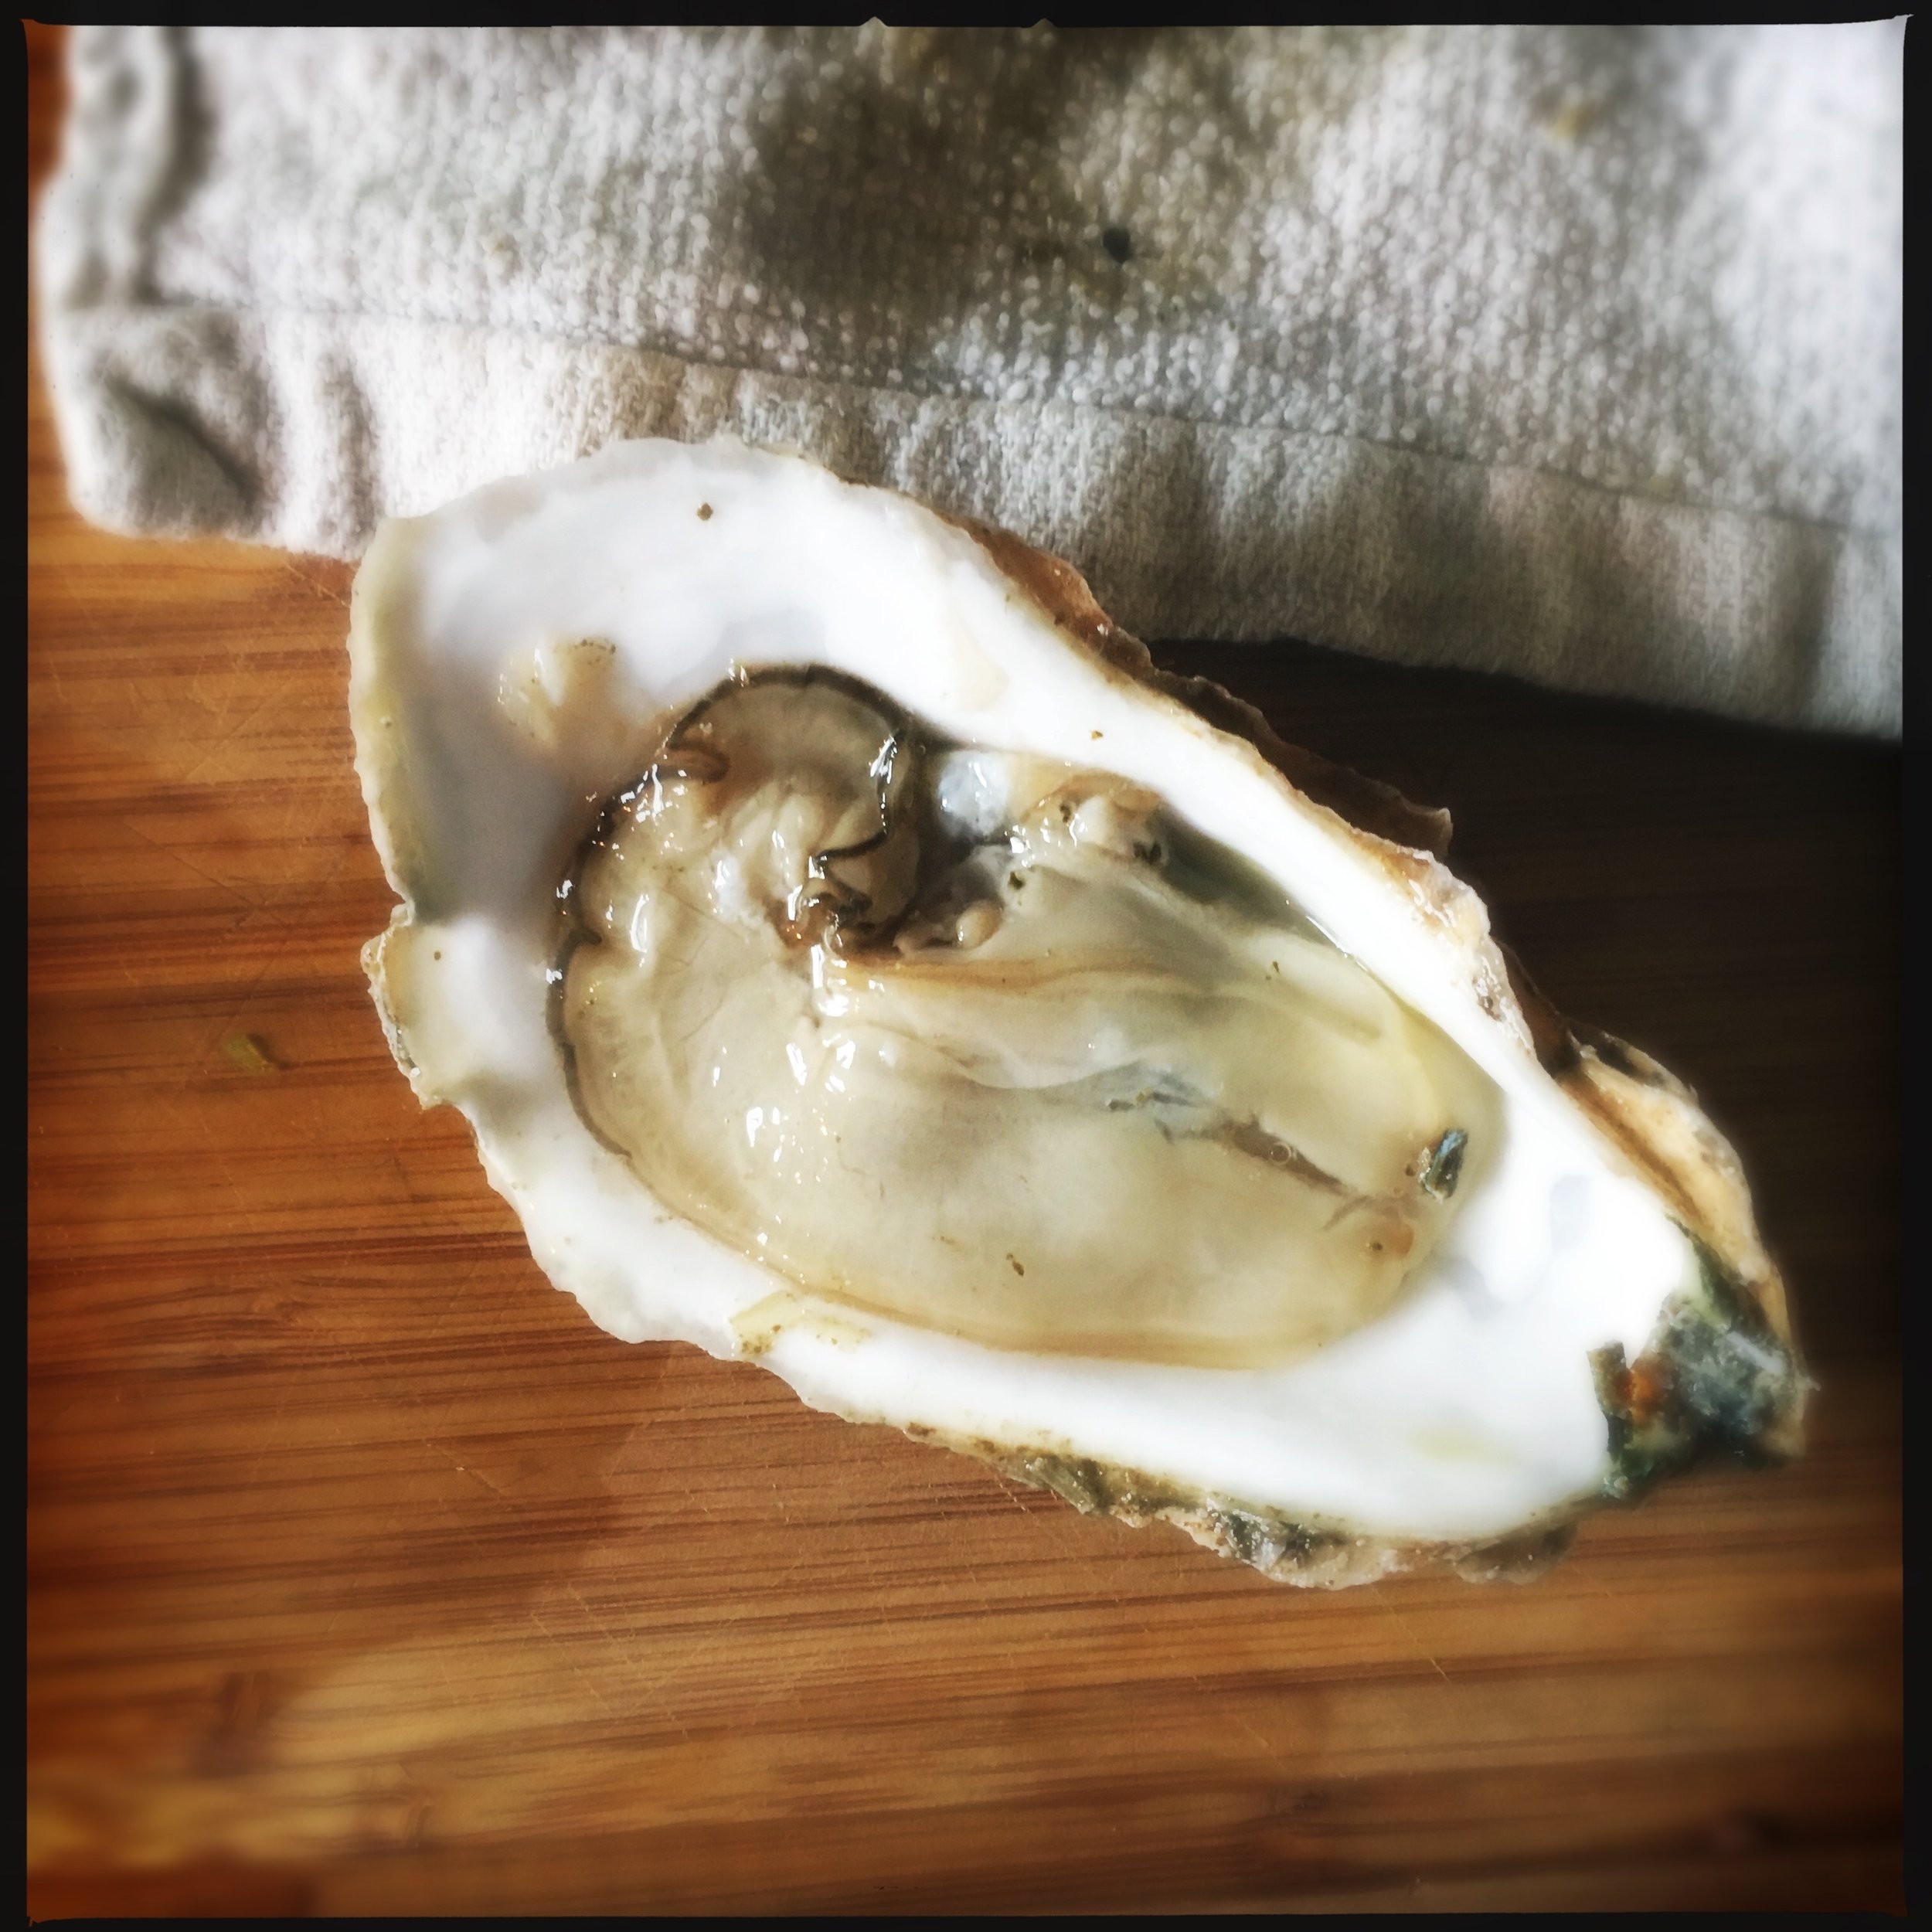
Once your oyster is open you can draw your knife along the bottom of the oyster to release the meat completely for easy eating. Try your best not to spill all the oyster liquor inside.
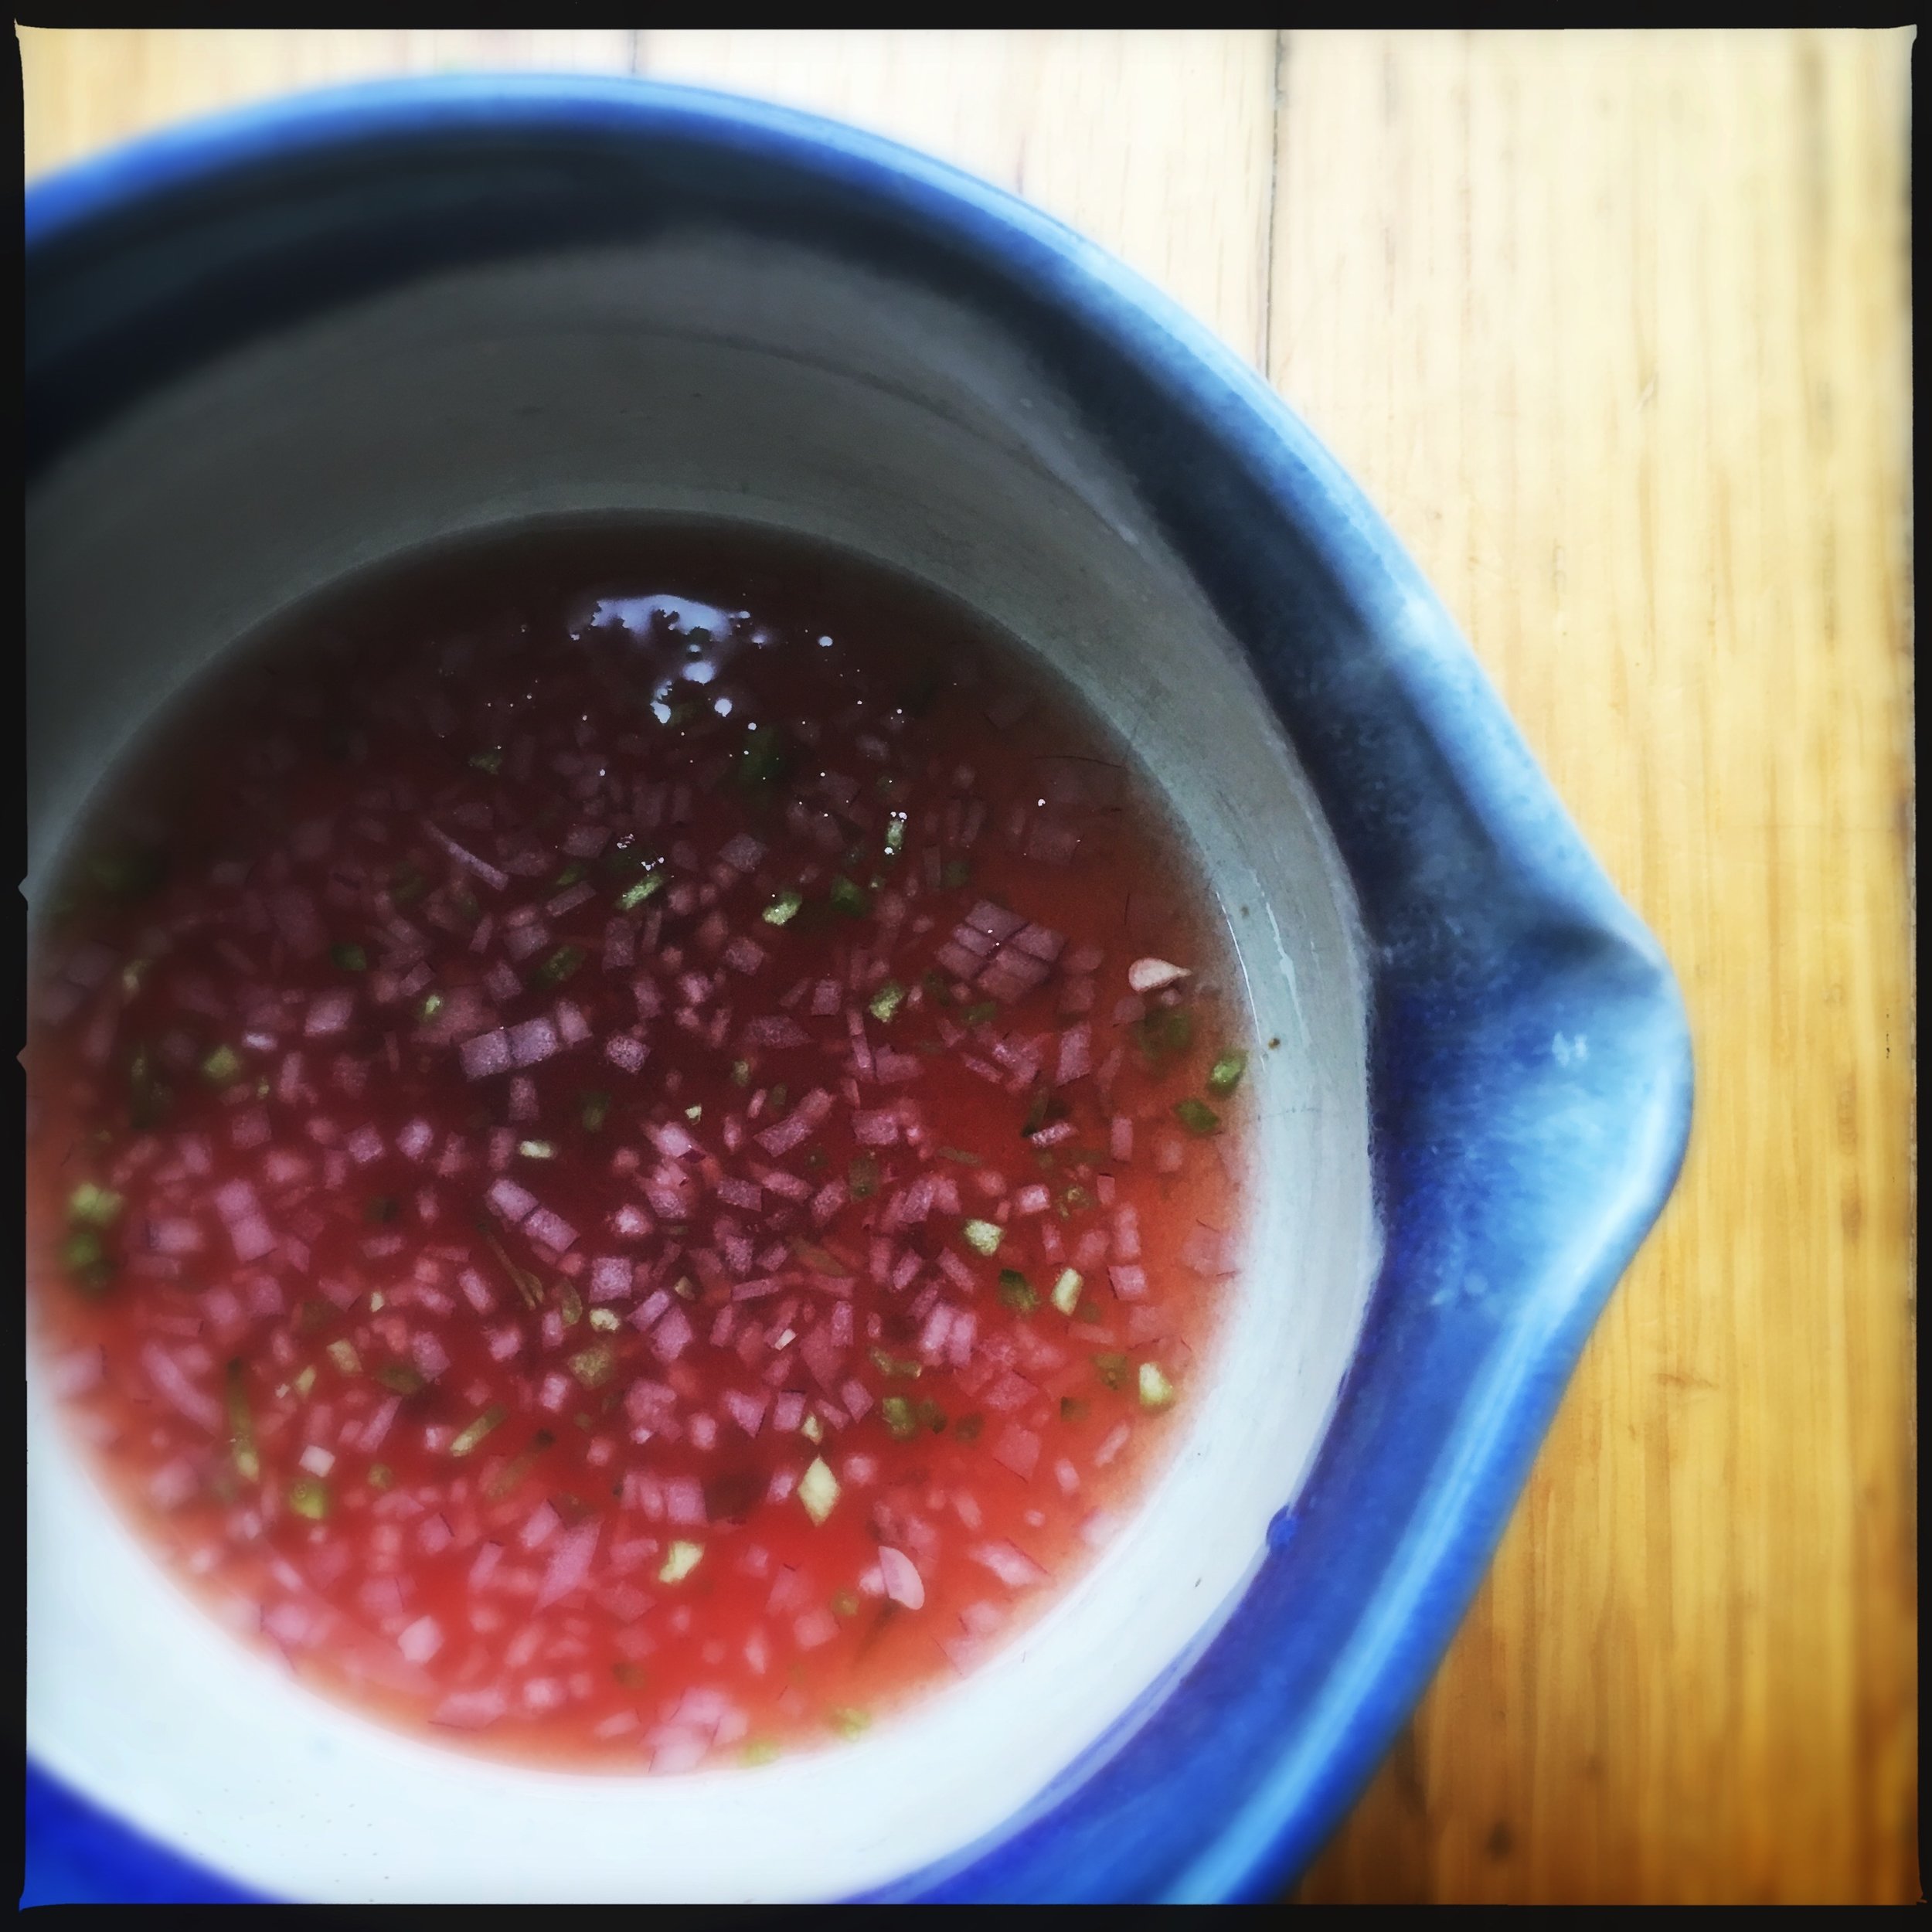
Yields quantity for 6-8 oysters.
Ingredients:
-4 tbsp fresh pressed watermelon juice
-2 tsp minced shallot
-1/2 tsp minced jalapeno
-2 tsp red wine vinegar
- cracked pepper
Simply mix together your ingredients, and you are ready to top your oysters! You can always double or triple the recipe if you are working with a large quantity of oysters.

I topped these with some pickled jalapeño and thinly sliced watermelon for presentation and extra flavor. Enjoy!
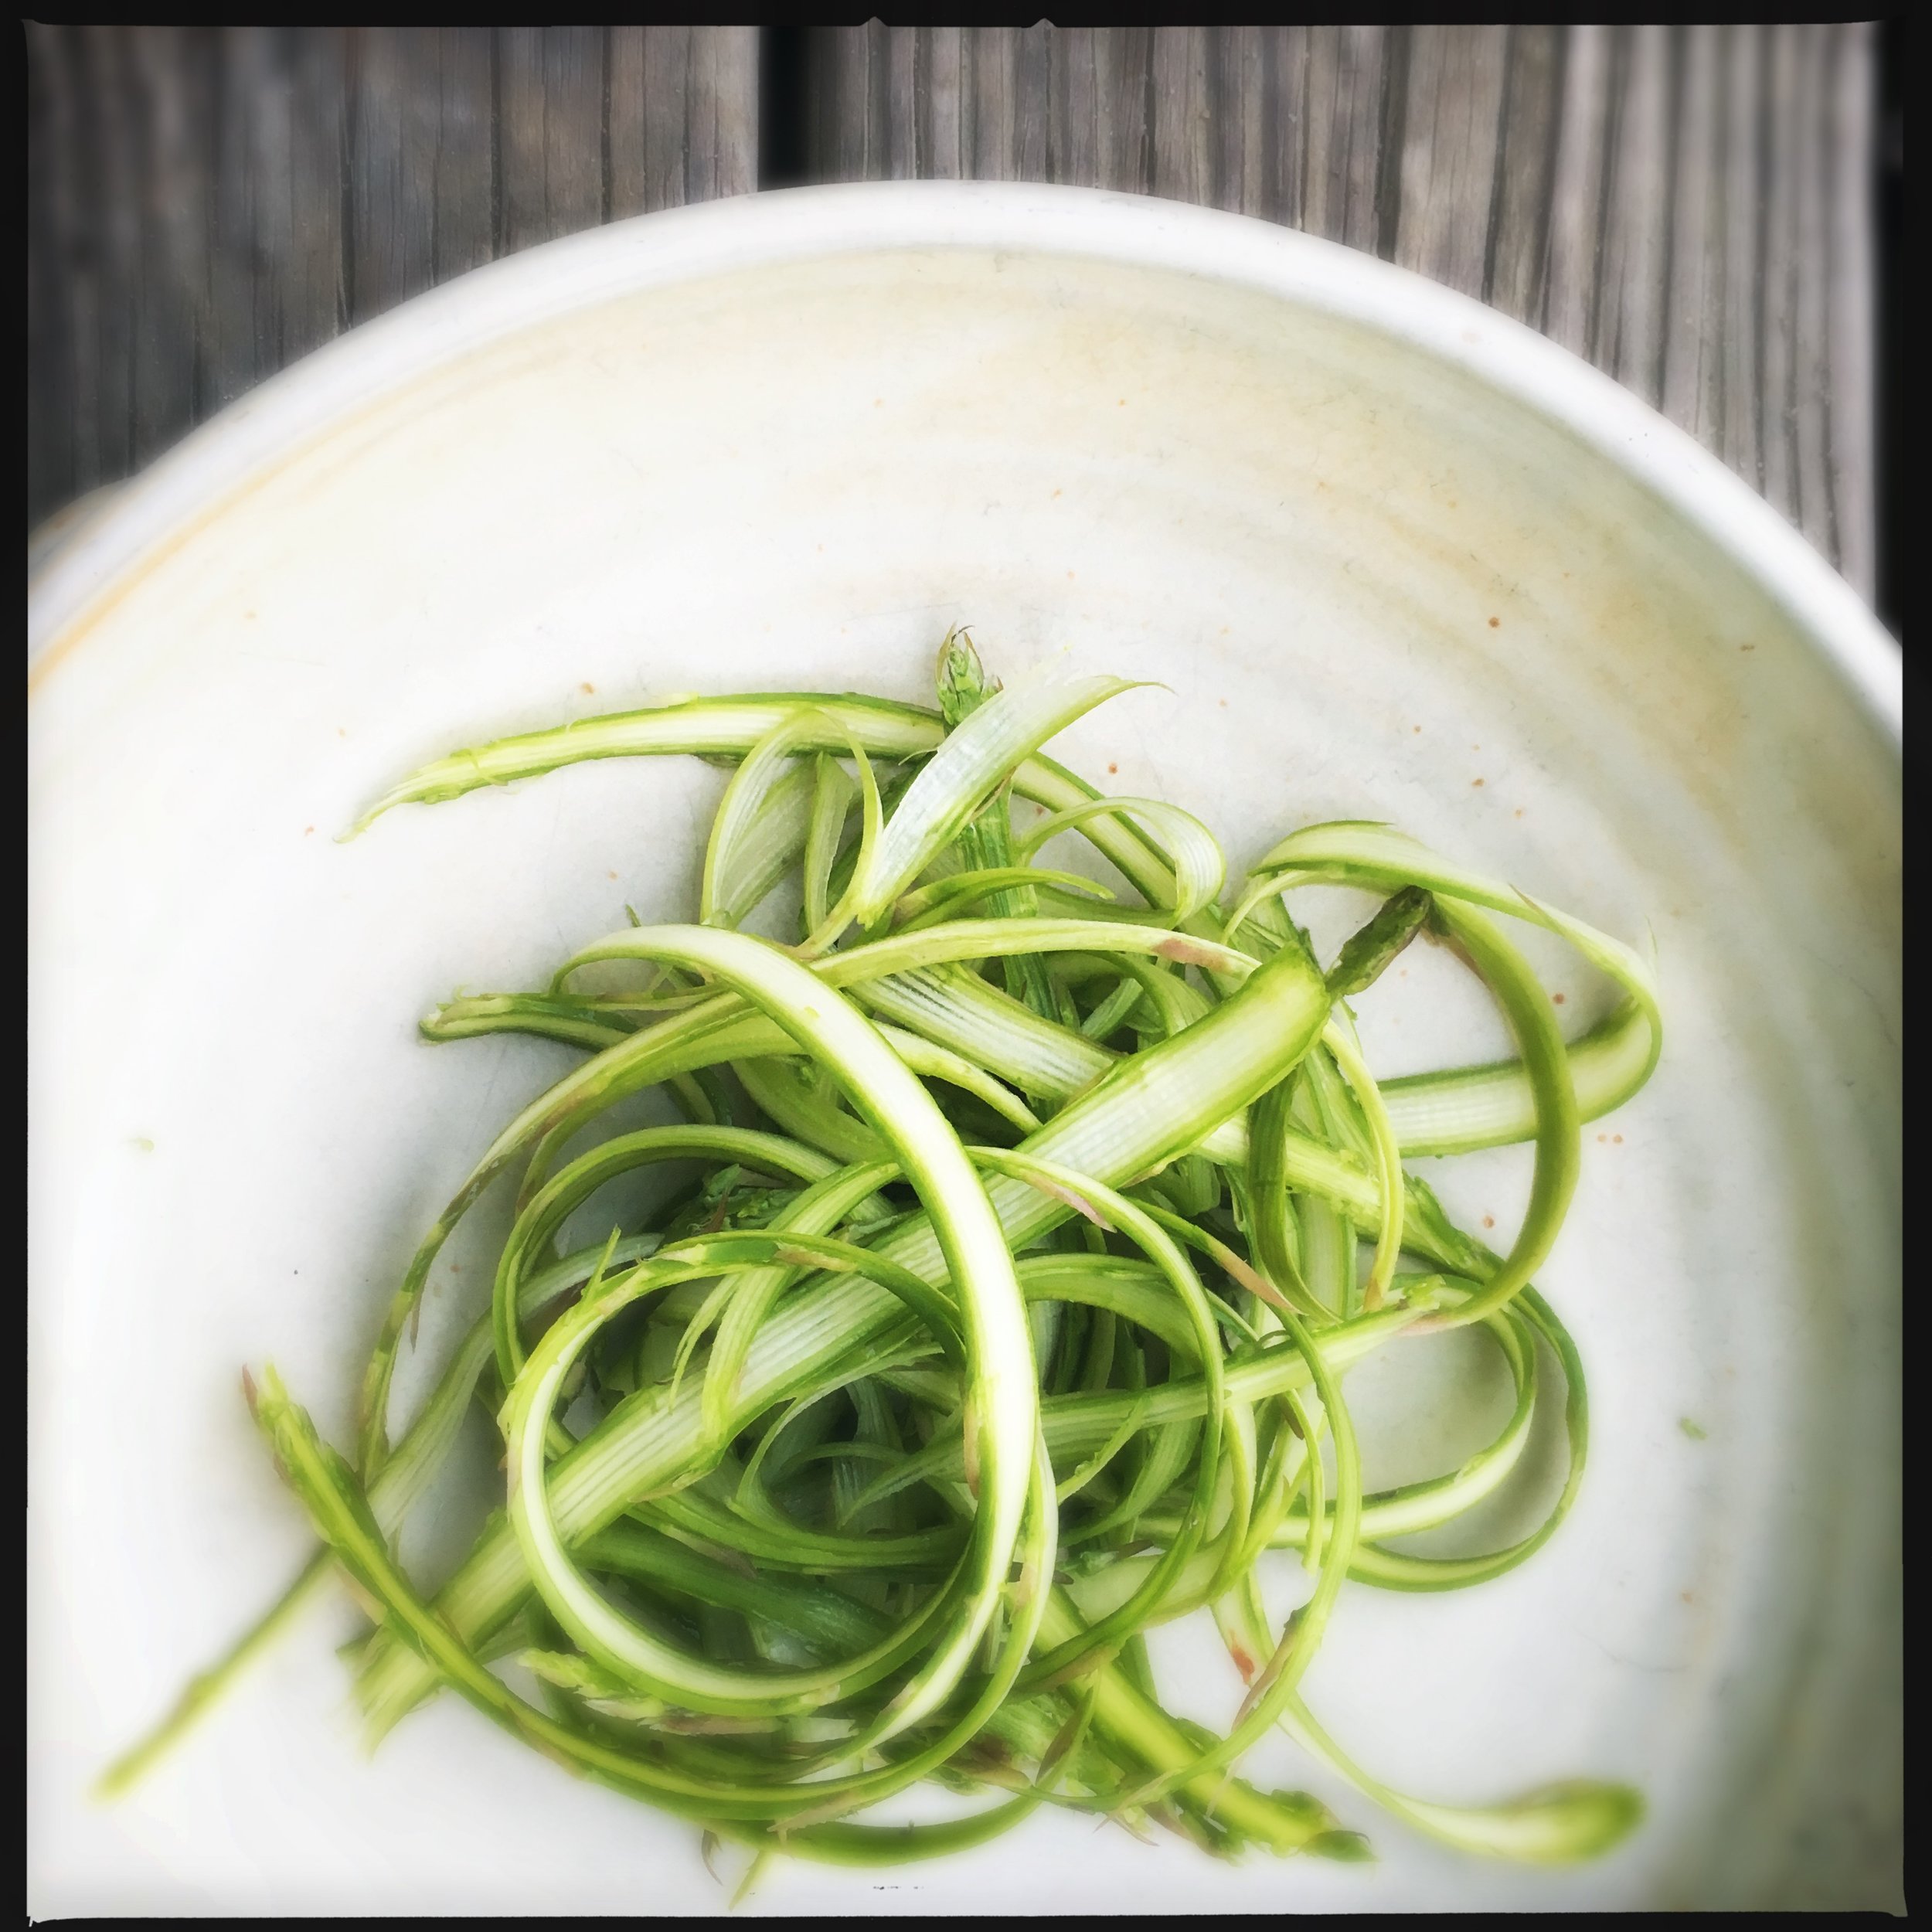
Spring is in the air, the bulbs are blooming and the spring vegetables are right around the corner. Asparagus is one of my favorite things to eat in season. When you pick fresh asparagus it is sweet and fragrant, the stalks are not woody, and the flavor is indicative of spring. On Martha's Vineyard we are fortunate to have several sources for fresh asparagus. When asparagus is in season you must get to local farms early as this delectable treat sells out in a matter of hours. Any ingredient can become tired if you eat it the same way over and over again. I have tried to think a little outside the box to create a different expression of one of my favorite vegetables. Miso soup is traditionally made with Dashi a soup stock made with seaweed and dried Bonito. This version of Miso soup is purely vegetarian.
Here is my version of a miso soup with an asparagus broth, shaved asparagus and shiitake mushrooms.
-2 bunches fresh asparagus
-Cut about two inches from the bottom of each stalk of asparagus, set aside.
-Lay asparagus stalks flat on the cutting board. Use a vegetable peeler to shave the asparagus lengthwise from the bottom to the tip. Try not to apply too much pressure, the goal is to create thin long ribbons.
-Set aside your ribbons for later
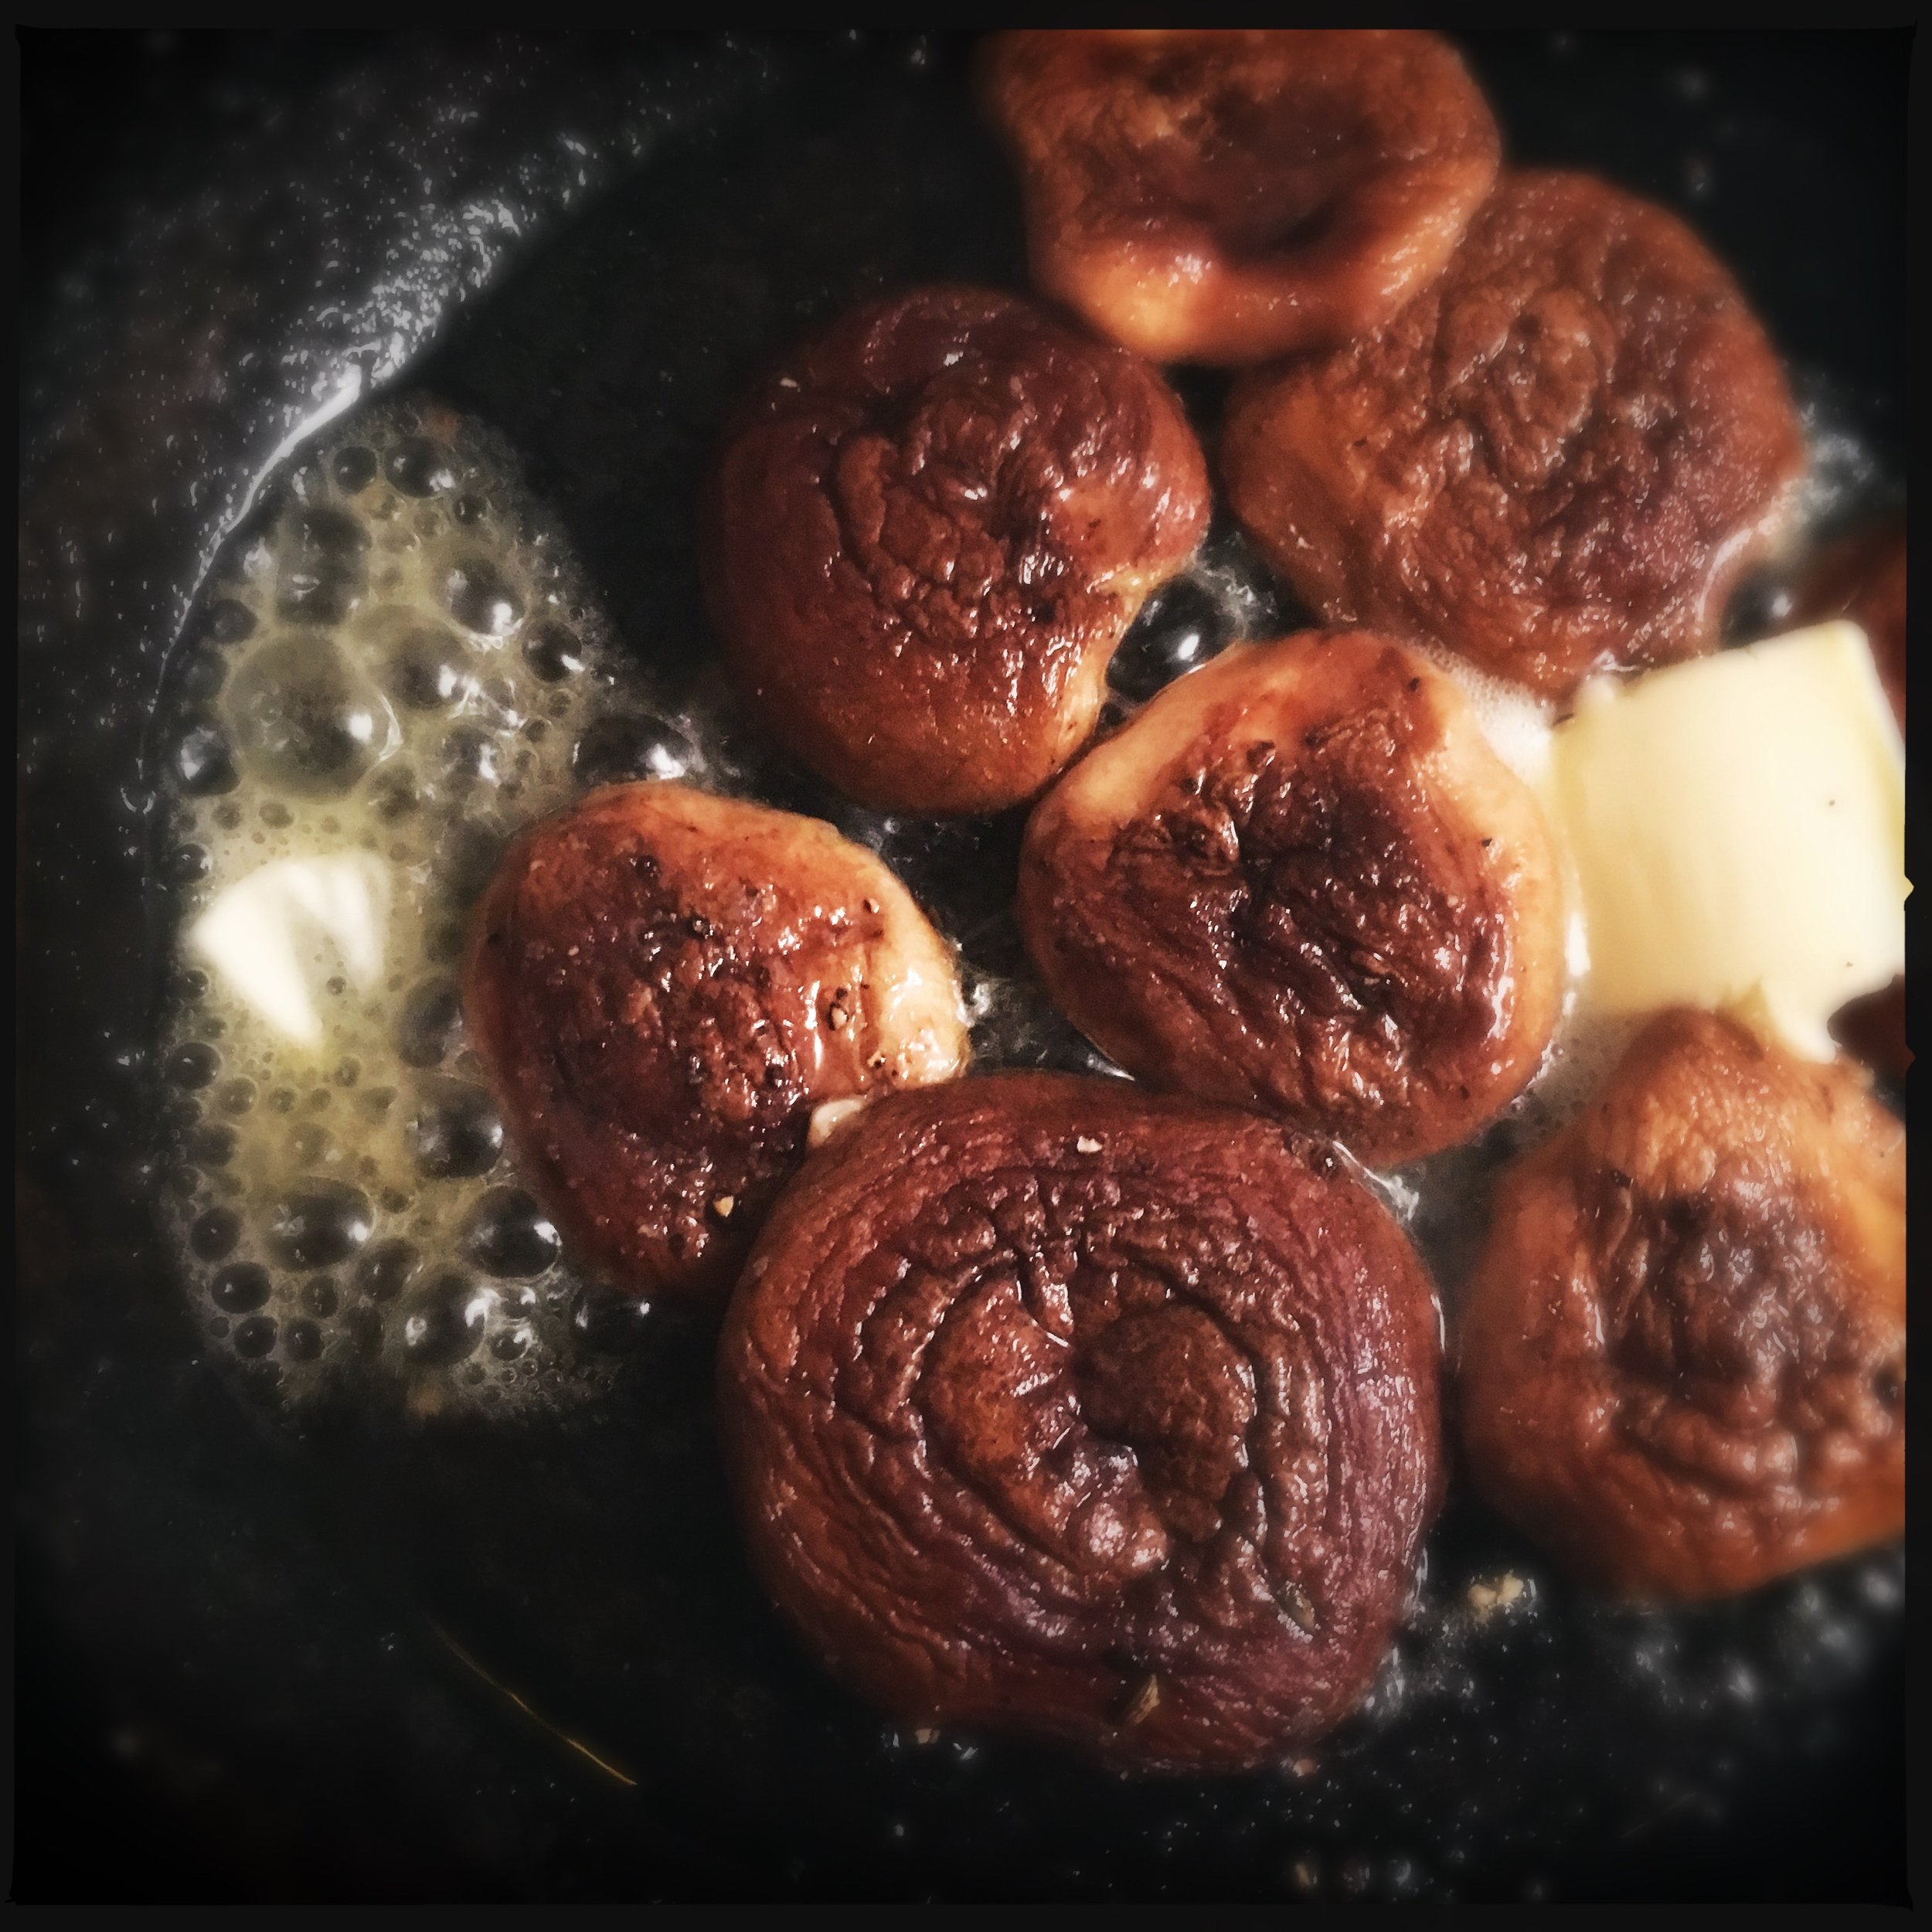
-1/4lb shiitake mushrooms
-2 tbsp butter
-salt&pepper

-Remove the stems from the mushrooms, and keep for stock. Hold them in your non dominant hand and gently draw a knife against the base of the stem. If you have not done this you will be surprised how little pressure it takes. (watch your thumbs)
-Place mushroom caps gill side up in a large lightly oiled skillet. sauté for 1 minute add salt and pepper then flip
-Cook for 1 more minute then add butter
-Place place pan into a 350 degree oven as the butter melts
-Cook for 5-10 minutes then set aside
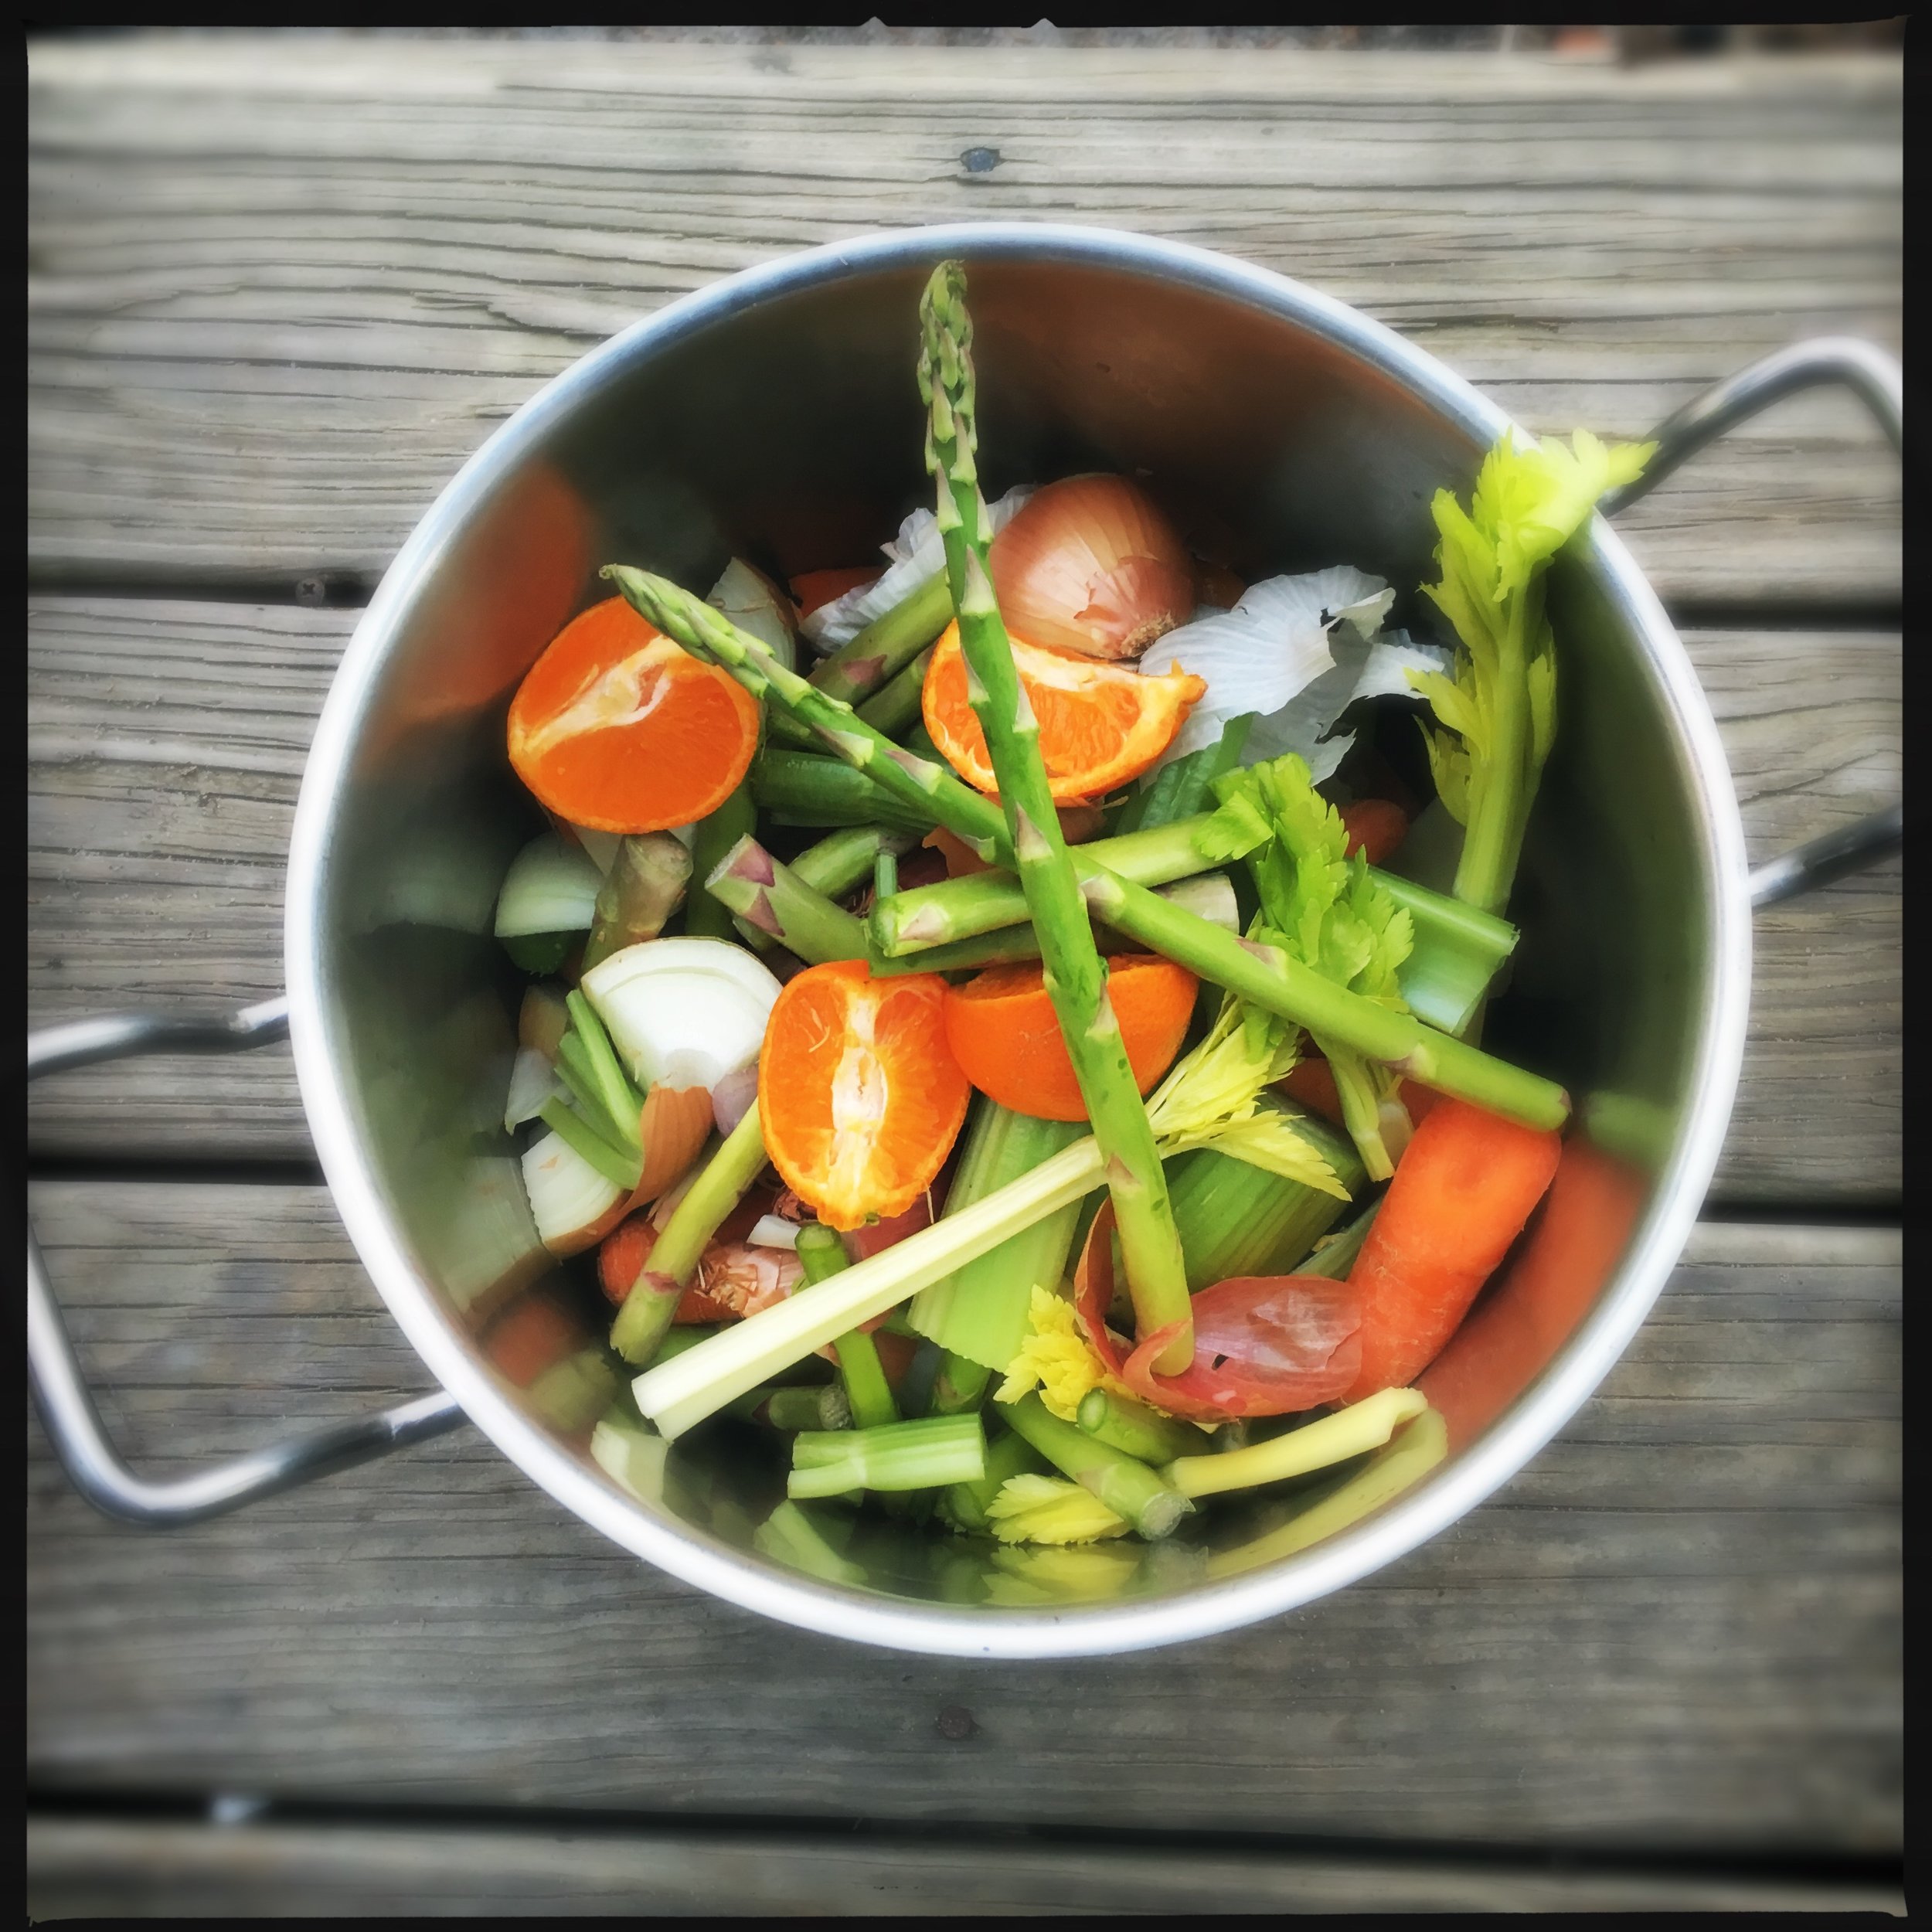
-Asparagus stems and scraps
-2-3 small onions, skin on (quartered)
-4 carrots (roughly chopped)
-8 stalks of celery (roughly chopped)
-4 inch piece of ginger (roughly chopped)
-1 whole clove of garlic (halved in the middle)
-2 Clementine oranges (quartered skin on)
-3 tbsp salt
-Combine all ingredients into a large stock pot
-Fill the stock pot with water and bring to a boil
-Reduce heat to a simmer for one hour
-Strain the broth into a separate container

-Miso 1 tbsp per cup of broth
- Place a hearty handful of your asparagus ribbons in the bottom of a serving bowl(s)
-Pour 1 cup per serving of your stock into a large saucepan
-Bring to a boil
-Place miso into a fine strainer
-Submerge the strainer into the liquid and push it with a spoon into your soup
-At this point it is ready to be served, you don't want the miso to sit on the stove
-Pour your miso broth over the asparagus ribbons and top with your shiitake mushrooms
This is an absolutely delicious way to eat asparagus, albeit time consuming. I assure you it's worth the wait. hope everyone enjoys!
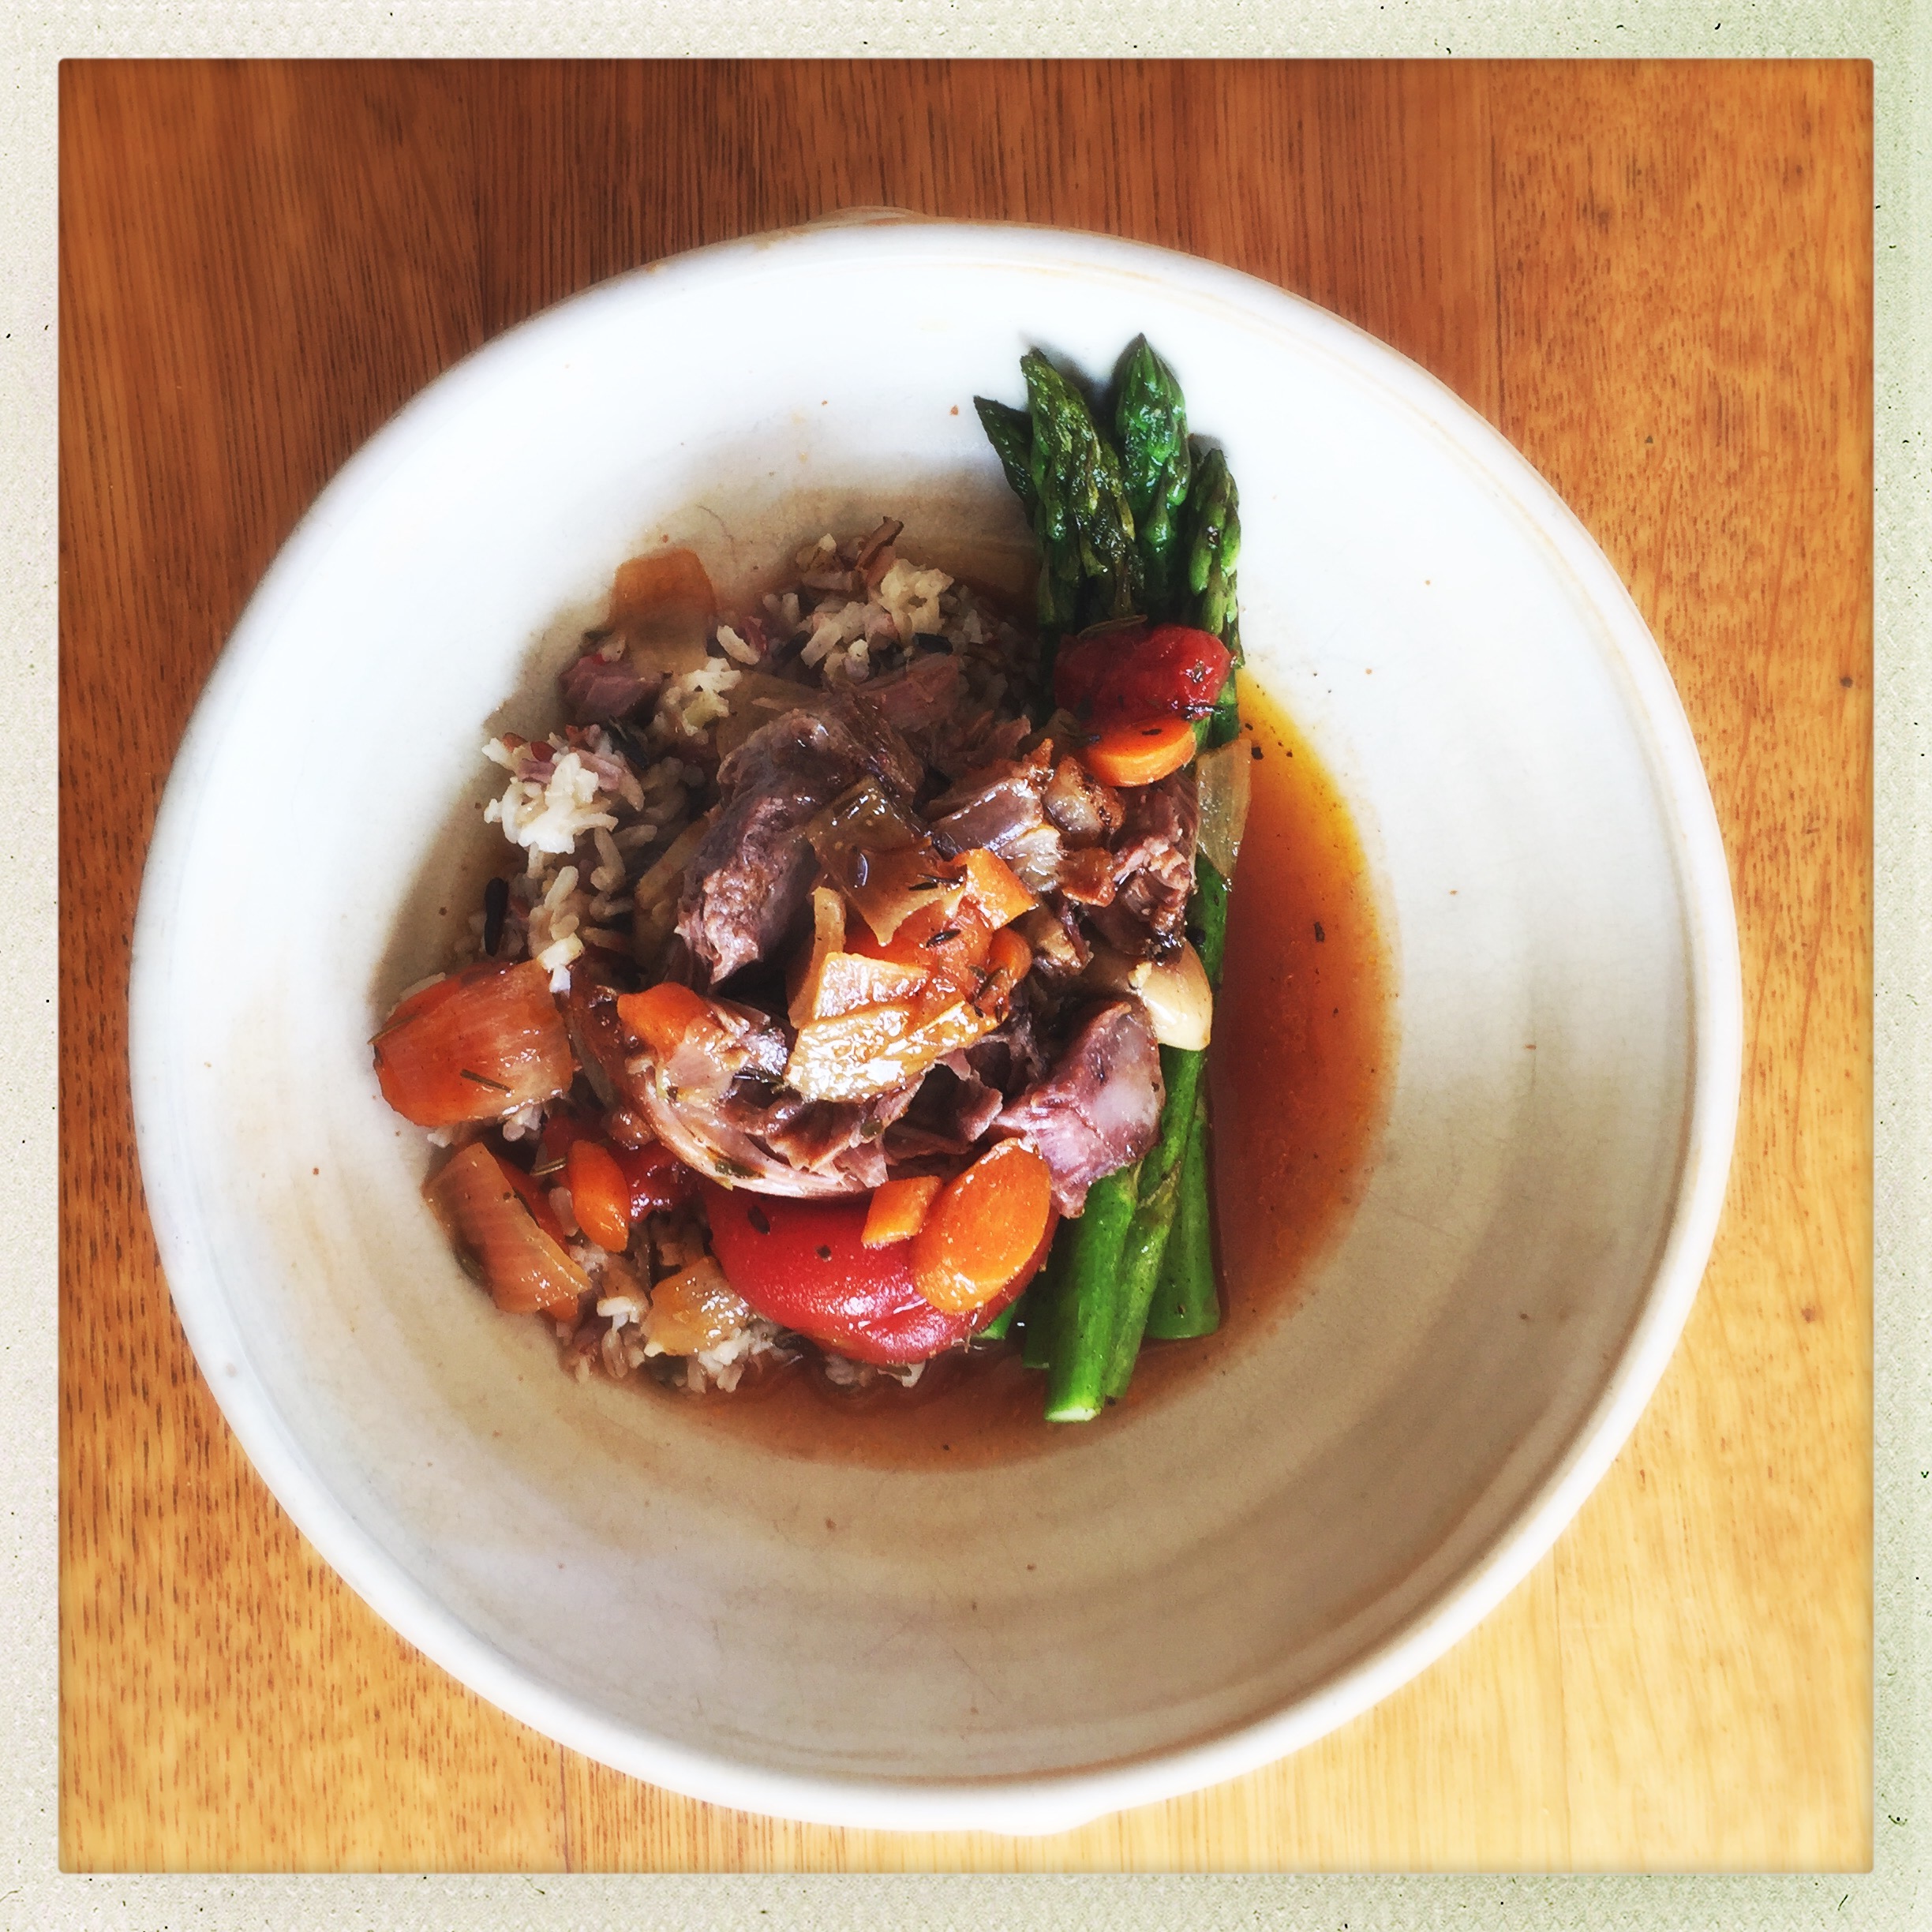
Its cold again on Martha's Vineyard... in April... But spring is in the air, and I had a hankering for braised lamb. I decided to ditch the wine, the flour, all the things that can make a braised piece of meat heavy. Lamb shank is inexpensive, and absolutely delectable if prepared properly. Here is a take on braised lamb shank that came out exceptionally well.
Ingredients
1 Lamb shank
1 Onion (chopped large)
3-4 Carrots (sliced)
4-5 Cloves of garlic peeled (whole)
1/2 Can whole peeled tomatoes
1.5 cups Beef broth
2 tbsp Herbs de Provence
1 tsp Smoked Paprika
1 tsp Ground mustard seed
.5 tsp Cumin
Directions:
-Preheat oven to 250 degrees
-Cover lamb shank in salt, paprika, and mustard seed
-Coat a dutch oven (or a heavy pot with a lid) with olive oil
-Brown the lamb shank on all sides (don't turn the heat up too high or the oil will burn)
-Set the lamb aside, and introduce the onions and carrots into the dutch oven with some salt and pepper
-Once the onions and carrots soften add in the whole peeled garlic and stir for 1 minute
-Add tomatoes (with juice), beef broth, and herbs
- Add the lamb shank, bring to a simmer, cover, then place covered pot into the oven for 2 and 1/2 hours
-Resist the urge to check on it, it is harder for some than others, but trust me. In 2 and 1/2 hours all of your patience will pay off and your worries will subside.
- If you have followed these simple instructions, you are probably in awe of the way the meat falls off the bone at this point.
I chose to serve this with rice, and asparagus. The rice helps soak up all the beautiful braising liquid, and the asparagus adds a welcome crunch.
It's cold here on Martha's Vineyard. The snow has been falling and the boats have been cancelled. This is the kind of day when there is no substitute for a good bowl of chili. I believe there is a better way than buying the bag of chili mix off the shelf.
-1 tbsp salt
-1 tsp oregano
-1 tsp cumin
-1 tsp smoked paprika
-1 tbsp ancho chili powder
-1 tbsp black peppercorns (whole)
-1.5 tbsp whole coriander (whole)
-1 tbsp fennel (whole)
-In small pan toast fennel and coriander seeds together until the aroma fills your kitchen (don't burn).
-Use a spice grinder to grind your peppercorns, fennel, and coriander.
If you only have access to ground coriander, fennel, and black pepper it will still be delicious.
-Combine all of your spices in a large bowl, and set them aside.
-2 large sweet or white onions (large dice)
-2 red bell peppers (large dice)
-2 green bell peppers (large dice)
-1-2 jalapeno peppers (small dice)
-1/4 cup olive oil
-3 cloves garlic (minced)
-2 tbsp peanut butter
-1 (15oz) can kidney beans
-1 (15oz) can black beans
-1 (28oz) can whole peeled tomato
-1 (28oz) can crushed tomato
-2 lbs ground beef
-salt & pepper
-Season beef with salt and pepper, and brown in dutch oven or stock pot, then set aside.
-Leave all the juices in your pot, and add 1/4 cup olive oil on medium low heat.
-Add in all of your spices and stir until mixture is uniform.
-Bring up the heat to medium high and add in your fresh vegetables (leave garlic aside).
-Mix your veggies until they thoroughly coated.
-Cook your veggies until the onions are soft and translucent (stir regularly).
-Drain and rinse black, and kidney beans.
-Once your veggies are soft add garlic and peanut butter. Stir until the peanut butter is mixed in, and the garlic begins to cook.
-Add in tomatoes and beans. Add water to the crushed tomato can to get the remaining tomatoes, and pour the water into the pot, and stir.
-Mix in your beef, and bring to a slow boil. This is the point things tend to stick to the pan so keep stirring.
-Once your chili has come to a boil, reduce to a simmer, cover with a lid, and stir every now and then for 45-60 minutes. (If you have all day you can leave it on the lowest heat and slowly cook it all afternoon).
When your peeled tomatoes start to fall apart its time to eat.


